
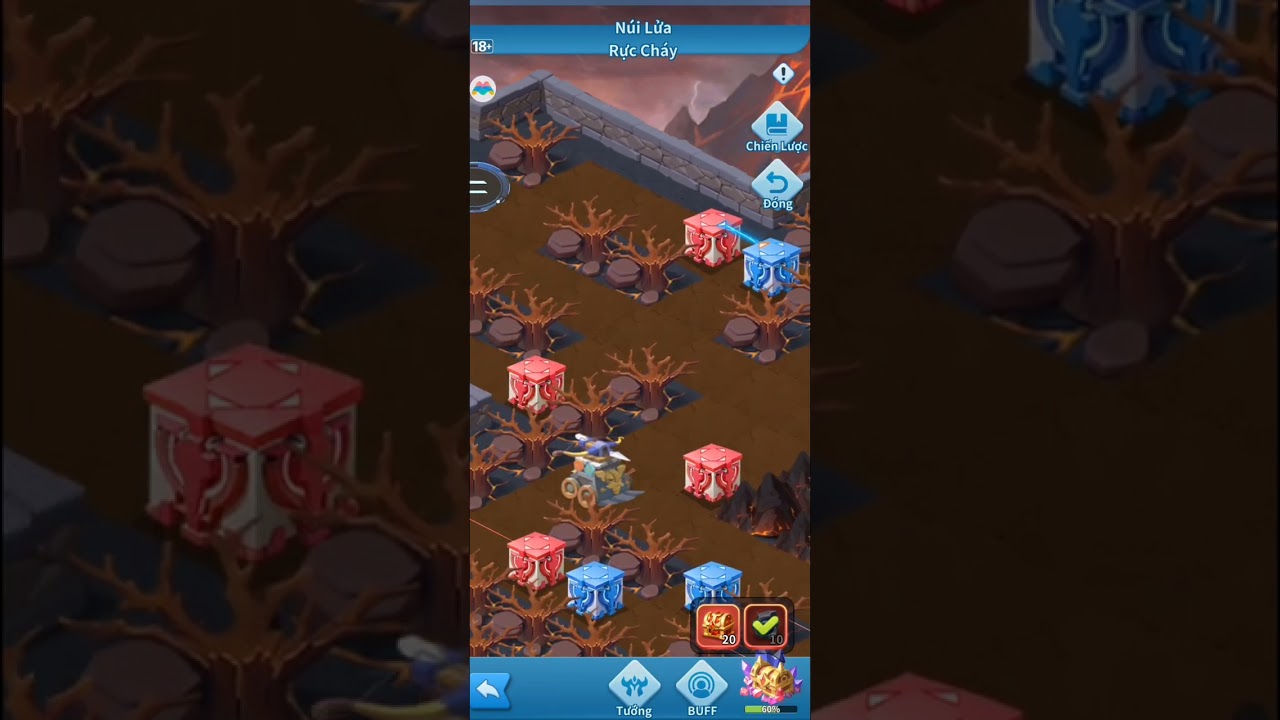
To achieve 100% completion in Hero Clash World Exploration Stage 24, Blazing Volcano, you must toggle the colored bridge mechanisms in an exact sequence and collect all perimeter chests before triggering late-stage levers that permanently block backtracking.
Team Lineup and Relic Priorities
Health and energy carry over between battles throughout World Exploration maps. Build your squad to withstand consecutive encounters without losing members to attrition:
- Sustain and Control: Deploy a reliable healer such as Mafalda or Celina, supported by a front-row tank with crowd-control abilities to absorb initial strikes.
- Combat Relics: Prioritize offensive buffs from early mob victories, particularly critical hit chance, raw attack percentage, and energy recovery.
- Survival Buffs: Choose flat damage reduction or life leech when offered early so your heroes finish trash fights at full health.
- Mid-Battle Forfeit: If your primary damage carry dies during any fight, immediately pause and forfeit. This resets the battle without locking in hero deaths, letting you adjust positioning and retry.
Step 1: Clear the Outer Perimeter and Gather Early Relics
Do not head directly toward the volcano core. Begin by sweeping the accessible outer edge to build relic strength:
- Defeat Perimeter Camps: Fight the weaker enemy nodes along the outer ring first to unlock your initial combat relics while keeping your frontline healthy.
- Loot Exposed Chests: Open every accessible treasure chest along the outer rim immediately. Leaving them behind increases the risk of being cut off once bridge states change.
- Survey the Bridge Colors: Identify the raised and submerged colored pillars—primarily red, blue, and yellow or green—across the lava channels.
- Activate the First Lever: Defeat the guard guarding the starting platform switch and flip the lever to raise the connecting bridge into the secondary quadrant.
Step 2: Navigate the Mid-Stage Lava Switches
The middle section contains interconnected colored gates where a single switch alters multiple pathways across the magma lake.
- Clear the Platform Fork: Defeat the elite enemy stationed at the central junction before touching any mechanisms.
- Lower the Peninsula Barrier: Flip the primary colored switch at the fork to open the path toward the side peninsula.
- Claim the Side Alcove: Cross the lowered bridge, defeat the local guard camp, and open the reward chest.
- Avoid Double-Toggling: Never activate a lever twice out of curiosity. A second flip inverts the bridge states across distant trenches. If a forward path is blocked, backtrack directly to the last switch rather than toggling unverified levers across the map.
Step 3: Clear the Late-Stage Caldera Without Lockout Traps
The route leading into the inner caldera contains an irreversible routing trap. Flipping the central lever before collecting adjacent side chests permanently isolates those rewards and forces a full stage reset.
| Stage Phase | Primary Objective | Failure Condition to Avoid |
|---|---|---|
| Caldera Approach | Defeat the guarding elite to reach the central hub. | Bypassing the switch before defeating the side camp. |
| Central Sequence | Redirect the inner platforms using the hub switch. | Flipping the lever before looting adjacent side chests. |
| Pillar Alignment | Form an unbroken bridge toward the northern sector. | Misclicking gates and trapping your avatar on an island tile. |
| Final Descent | Lower the magma barrier guarding the boss platform. | Leaving southern bridge levers in an inverted configuration. |
Before flipping the mechanism that raises the bridge to the upper sanctum, inspect the surrounding platforms. Confirm that every side chest on the southern side has been looted. Advancing past this junction seals off the southern corridors for the remainder of the run.
Step 4: Defeat the Final Boss and Verify 100% Completion
The final platform contains high-burst enemies that can eliminate fragile damage dealers early in the fight:
- Pre-Charge Ultimates: Enter the boss platform with full energy on your primary carry, built up from the final mob encounter.
- Execute Opening Burst: Trigger your damage carry's ultimate at the start of combat to burst down the enemy backline before they cycle crowd-control skills.
- Check Exploration Progress: After defeating the boss, do not click the exit prompt immediately. Pan the camera across the map and verify that the progress tracker reads 100%. Check rock alcoves and lowered bridge ends for any missed crates before exiting.

Free Hero Clash Codes
Current active codes and how to redeem them.

Sarah Williams
Sarah specializes in RPG and collection games, explaining team building, character growth, and beginner-friendly ways to avoid expensive early mistakes.
COMMUNITY
Player Comments
46 players commented on this guide.
This helped me understand heroes much better.
Good guide for Hero Clash players. The heroes part was useful.
I tried this today and it worked better than my old setup.
This saved me time in the early game.