
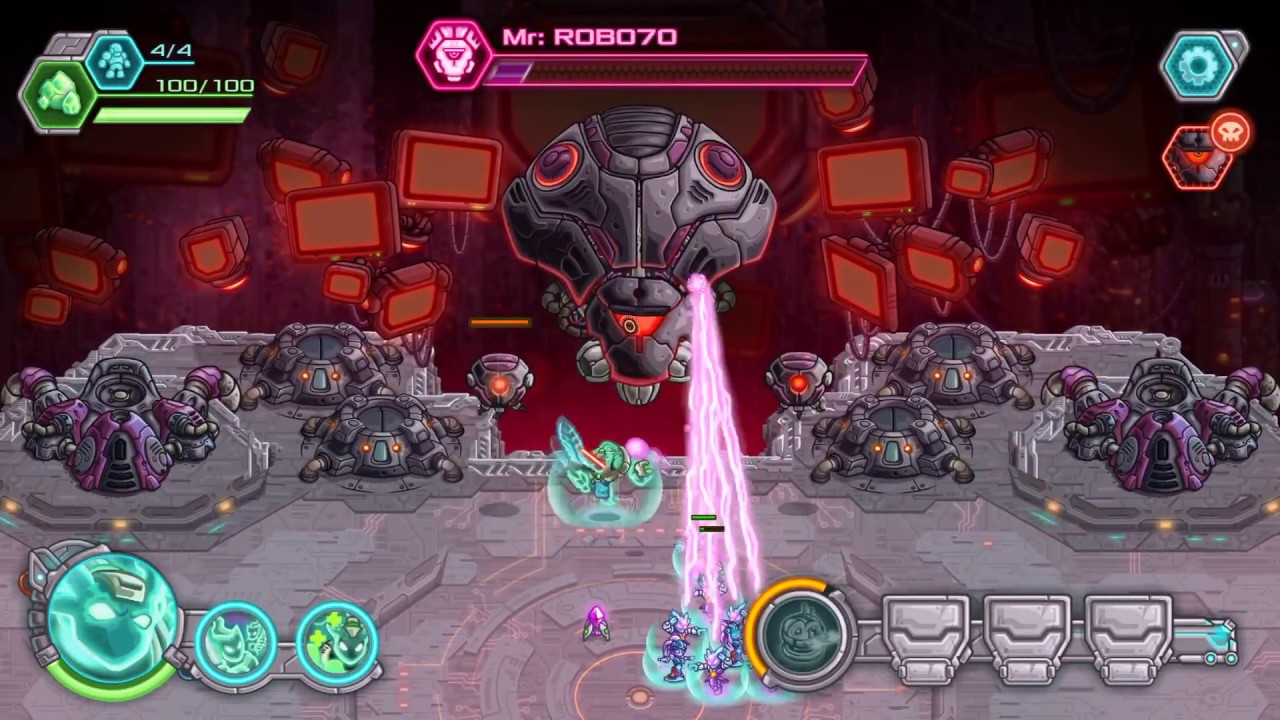
To defeat The Curator in Iron Marines+, split your forces across both flanks of the arena, dodge telegraphed linear lasers, immediately destroy incoming repair drones before they restore the boss's health, and save burst damage for Phase 3.
Recommended Squad Composition
A successful loadout pairs high-durability anchors with long-range single-target damage:
- Frontline Anchors: Deploy heavy mechs or durable brawlers in the central approach to draw fire from incoming security automatons.
- Long-Range Damage: Position snipers or missile platforms behind your frontline to attack the core from outside hazard rings. Avoid short-range melee infantry, as ground hazard circles will destroy them before they can deal consistent damage.
- Hero Placement: Select a commander equipped with heavy targeted burst or area-denial abilities to wipe drone clusters. Keep your hero offset to one flank rather than stacked on top of your ranged squads to prevent a single orbital blast from hitting your entire army.
Phase Breakdown
The encounter transitions across three phases based on The Curator's remaining health pool:
| Phase | Health Threshold | Primary Boss Threats | Core Tactical Response |
|---|---|---|---|
| Phase 1 | 100%–65% HP | Linear laser beams, basic security drone drops | Split squads across the left and right flanks; bait linear beams through the empty center. |
| Phase 2 | 65%–30% HP | Kinetic shield barrier, tethered repair automatons | Stop attacking the boss; destroy repair drones and shield pylons immediately. |
| Phase 3 | 30%–0% HP | Sweeping dual beam lasers, rapid automaton waves | Maintain constant movement; trigger hero ultimates and special weapons directly on the core. |
Phase 1: Flank Positioning and Telegraphed Lasers
The Curator telegraphs linear laser beams using illuminated ground corridors two to three seconds before firing. Keep your squads separated into two fire teams on opposite flanks. When the boss targets one side, move only that team out of the illuminated lane, allowing the opposite flank to continue firing without interruption.
Phase 2: Shield Interruption and Repair Drones
At roughly 65% health, The Curator activates an invulnerable kinetic barrier and summons support drones. Firing at the boss while this barrier is active deals zero damage and wastes cooldowns. Immediately retarget all units onto the support automatons tethered to the boss, as their healing beams will quickly undo your progress.
Phase 3: Final Core Burn
When The Curator drops below 30% health, it enters an overdrive state, sweeping dual energy beams across wide arcs of the arena while spawning continuous waves of combat drones. Do not attempt to clear every standard security drone in this phase. Keep your units moving to avoid the sweeping beams, deploy saved special weapons, and focus all single-target abilities directly onto the exposed core to finish the fight.
Drone Target Priority
Maintaining strict target discipline prevents The Curator from out-healing your squad damage:
- Repair Drones: Destroy these flying automatons first to sever their healing tethers to the core.
- Heavy Combat Automatons: Eliminate ranged security bots next to protect your backline damage dealers.
- Swarming Security Drones: Clear swarms using hero area-of-effect abilities or splash damage.
- The Curator Core: Direct all focused firepower onto the boss only when support drones are dead and the kinetic shield is down.
Positioning Micro and Resource Management
Preserving existing squads protects your Ether economy far more effectively than training replacements mid-fight. Use short, precise move orders to step out of telegraph markers, keeping squads within firing range of their targets. If a unit takes critical damage, pull it back to the edge of the arena to recover. Reserve your stored Ether to purchase tactical strikes or heavy weapon drops during Phase 3, allowing you to bypass prolonged attrition and destroy the core quickly.

Free Iron Marines+ Codes
Current active codes and how to redeem them.

Emily Johnson
Emily writes practical mobile strategy guides with a focus on resource planning, base progression, and the early decisions that shape a long-term account.
COMMUNITY
Player Comments
71 players commented on this guide.
Can you add more details about strategy in a future update?
This helped me understand strategy much better.
Nice guide. I am checking the other Iron Marines+ articles next.
Good guide for Iron Marines+ players. The strategy part was useful.