
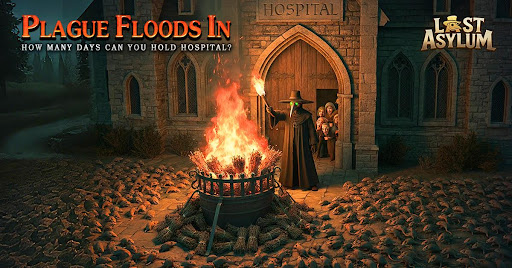
Survival in Last Asylum: Plague: Plague is rarely about brute force; it is about spatial awareness and resource management. Nowhere is this more apparent than during high-density swarm events in enclosed transit environments, such as the claustrophobic train carriages that often serve as death traps for the unprepared. When the corridors shrink and the swarm grows, your ability to manipulate the environment determines whether your squad reaches the extraction point or becomes another casualty of the plague.
To succeed in these high-stakes scenarios, you must transition your mindset from "total elimination" to "tactical displacement." This guide breaks down the mechanics of surviving tight-quarter evacuations by mastering terrain, momentum, and team positioning.
Identifying and Utilizing Environmental Bottlenecks
The most effective way to survive a swarm that outnumbers you ten-to-one is to force them into a single-file line. In Last Asylum: Plague: Plague, AI enemies typically pathfind toward the shortest distance to your units. You can exploit this behavior by identifying structural bottlenecks—doorways, narrow aisles between rows of seats, or debris-blocked corridors.
When you reach a narrow passage, do not attempt to engage the entire horde in an open area. Instead, retreat slightly and form a defensive wall at the threshold. By positioning your tank or high-armor units at the mouth of the bottleneck, you limit the swarm’s surface area. Only one or two enemies can attack your frontline at a time, while your high-DPS units behind them can focus fire on the restricted entry point. This creates a "meat grinder" effect where the swarm is neutralized before they can exert pressure on your healers.
Vertical Mobility and Elevation Tactics
New players often fall victim to the "ground-level trap," where they remain at floor height, becoming easily surrounded and pinned by rapidly spawning enemies. In Last Asylum: Plague: Plague, verticality is your greatest tactical asset.
Look for overhead luggage racks, elevated seating platforms, or maintenance hatches. When a swarm overwhelms your position, transitioning to an elevated surface forces the AI to pathfind around or cluster underneath you. This provides two critical advantages:
- Damage Mitigation: By creating distance, you break the line-of-sight for melee-focused enemies.
- AoE Efficiency: Clustered enemies beneath an elevated platform are perfect targets for area-of-effect grenades or abilities.
Always scan your environment for "climbable" assets the moment you enter a new segment of the train. Staying above the swarm keeps your squad mobile and creates a "dead zone" where enemies are forced to bunch up, making them significantly easier to manage.
Managing Momentum During Evacuation
The most common mistake in Last Asylum: Plague: Plague evacuation missions is the "static defense" fallacy—staying in one room to clear every single enemy. In transit scenarios, the swarm is often infinite or waves will continue to spawn until you reach the exit. Every bullet fired at a non-essential target is a waste of resources if it doesn't help you move forward.
To maintain momentum effectively, use these three strategies:
- Crowd Control (CC) as a Pathing Tool: Use stuns, slows, or knock-back abilities not to kill, but to create "soft gaps" in the swarm. If you stun the front row, you can sprint past them toward the next carriage without needing to expend ammunition to clear them.
- The Leapfrog Formation: If you are being pursued, never move the entire squad at once. Have one half of your squad move forward to secure the next doorway while the other half provides covering fire. Then, switch roles. This ensures you are never caught out in the open during a reload or ability cooldown.
- Exit Priority: If your mini-map indicates a secondary swarm approaching from the rear, ignore loot and optional objectives. The goal is extraction; the reward is survival.
Trade-offs of Aggressive Positioning
Aggression is useful, but it is high-risk. Pushing too deep into a carriage without clearing the rear can lead to being "pincered." If you have a high-DPS squad, you may be tempted to rush ahead to clear the path, but this often leaves your support units vulnerable to flankers emerging from hidden spawn points.
Before deciding to push, assess your squad’s "sustain" status. If your healers have depleted their cooldowns, stop pushing. Hold a defensive angle in the current room until your resources reset. It is better to spend an extra thirty seconds in a secured room than to be caught in the middle of a transition corridor with no defensive buffs.
Key Decision Matrix for Enclosed Spaces
| Situation | Recommended Action | Why it works |
|---|---|---|
| Swarm in front | Bottleneck Defense | Minimizes incoming damage by restricting enemy contact. |
| Swarm surrounding | Seek Elevation | Breaks AI pathing and creates a safe "dead zone." |
| Objective is far | Leapfrog Movement | Ensures constant movement while maintaining defensive coverage. |
| Resources low | Hold & Wait | Prevents total squad wipe; prioritize cooldowns over distance. |
By mastering these mechanics, you will find that Last Asylum: Plague: Plague becomes less about frantic clicking and more about calculated movement. Remember: in the confined death traps of the train, speed is your armor, and positioning is your best weapon. Always look for the next exit, keep your squad in a formation that supports movement, and never let the swarm dictate the pace of the engagement.

Free Last Asylum: Plague Codes
Current active codes and how to redeem them.

Emily Johnson
Emily writes practical mobile strategy guides with a focus on resource planning, base progression, and the early decisions that shape a long-term account.
COMMUNITY
Player Comments
139 players commented on this guide.
This saved me time in the early game.
This guide answered the exact question I had.
I tried this today and it worked better than my old setup.
The explanation is clear, especially for beginners.