
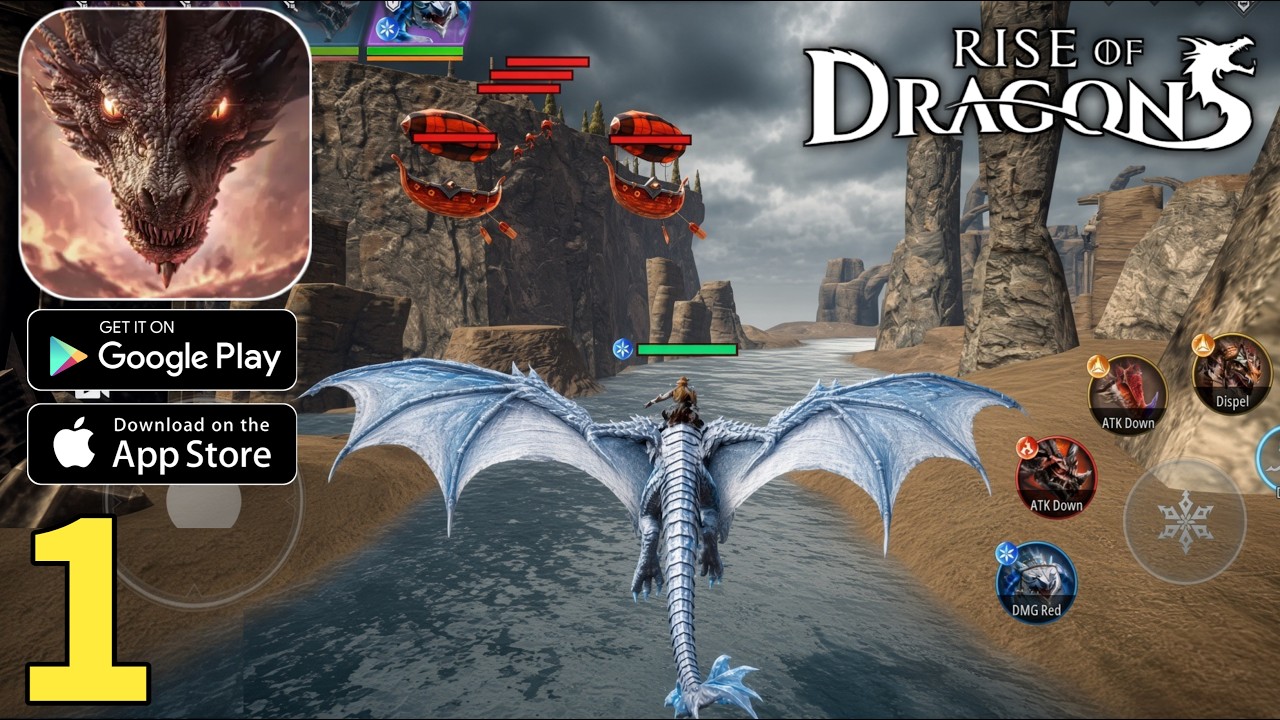

To excel in Rise of Dragons: War, players must move beyond basic shooting and prioritize the fluid, 3D aerial movement mechanics that define the game’s core combat loop. Unlike standard arcade shooters, this title demands constant spatial awareness, precise positioning, and the ability to cycle through elemental dragon types on the fly. By mastering these systems early, you can secure victory in high-intensity sky duels and effectively manage the pacing of your combat encounters across diverse, hazard-filled battlefields.
Leveraging Elemental Switching for Tactical Advantage
Victory in Rise of Dragons: War hinges on your ability to adapt to enemy threats in real-time. Each dragon you command possesses unique elemental properties—such as fire, ice, or storm—which function as your primary tools for battlefield control. Understanding the strengths and weaknesses of these elements is critical, as the game frequently pits you against varied enemy waves that require specific elemental counters to defeat efficiently.
You should practice swapping your active dragon mid-combat to maintain a consistent damage output. When facing tankier enemy units, utilizing heavy elemental impact attacks can break through shields and defenses that standard projectiles might struggle against. Keep a close eye on your cooldowns and resource meters; the game rewards players who weave different elemental attacks together rather than relying on a single, static combat style. For example, using a storm-based dragon to slow down a cluster of enemies before switching to a fire-based dragon for massive area-of-effect damage is a hallmark of high-level play.
Mastering 3D Aerial Movement and Positioning
The 3D nature of the combat in Rise of Dragons: War means you are never restricted to a two-dimensional plane. Successful Dragon Knights treat the entire sky as their playground. You must learn to use verticality to dodge incoming projectiles; flying higher or diving below an enemy’s line of sight is often far more effective than attempting to strafe horizontally.
When engaging in intense duels, avoid flying in predictable, straight lines. Enemies are programmed to track your trajectory based on your current vector, so incorporating banking turns and sudden altitude changes will significantly reduce the damage you take. Think of your movement as an extension of your weapon; by positioning yourself behind an enemy formation, you can unleash elemental fury without exposing yourself to direct fire from their front-facing cannons or breath attacks. Mastering the "dive-and-weave" maneuver—where you drop altitude sharply while circling an enemy—allows you to remain in their blind spot while keeping your own attacks locked on target.
Optimizing Attack Rhythms in Sky Duels
Combat in this game is not just about holding down the fire button; it is about managing the rhythm of your attacks. Each dragon has a specific firing cadence, and understanding the "wind-up" or "recovery" time of these attacks is essential. Over-committing to a long-range attack animation can leave you vulnerable to counter-attacks if you are not prepared to move immediately after the volley.
Focus on these rhythm-based strategies to improve your survival rate:
- Burst Fire: Unleash your heavy elemental skills when an enemy is stationary or locked in their own attack animation.
- Strafing Runs: Move constantly while firing to maintain a "hit-and-run" profile that makes it difficult for AI enemies to lock onto your position.
- Resource Management: Monitor your dragon’s stamina or energy bar; always keep a small reserve of energy to perform emergency evasive rolls or high-speed dashes.
- Animation Canceling: Learn the timing of your primary attacks to know exactly when you can cancel out of a recovery frame by initiating a movement input.
Navigating Battlefield Hazards and Objectives
Battlefields in Rise of Dragons: War are rarely empty, and the environment plays a pivotal role in your success. You will encounter floating obstacles, debris, and atmospheric hazards that can hinder your movement or provide cover. Seasoned players use these structures to break the line of sight when their dragon is low on health, allowing for a brief window of recovery before returning to the fight.
Always identify the objective markers during a mission. Whether you are tasked with clearing a specific number of enemies or protecting a location, the game’s flow requires you to balance aggression with objective prioritization. If you find yourself overwhelmed, use your dragon’s speed to break away from the main cluster of enemies, circle around the map’s periphery, and re-engage from a more advantageous, isolated angle. Never chase a single enemy into a cluster of high-damage environmental hazards.
Progression Priorities for New Dragon Knights
As you progress through your initial missions, focus on upgrading your primary dragon’s core stats rather than spreading resources too thin across multiple units. The game’s difficulty scales as you encounter more diverse aerial threats, and having one highly capable dragon will serve you better in the early chapters than having three underpowered, base-level units.
Prioritize leveling up the dragon that complements your preferred playstyle—be it high-speed harassment or heavy-hitting elemental damage. Pay close attention to the upgrade requirements mentioned in the game’s UI; these often involve resource milestones that can be farmed efficiently by repeating earlier, shorter missions. By reinvesting your earned currency back into your primary dragon’s elemental mastery, you ensure that your offensive capabilities always outpace the escalating health pools of the enemies you encounter in later stages.
Strategic Decision Making: When to Retreat vs. Engage
One of the most overlooked aspects of Rise of Dragons: War is knowing when to abandon an engagement. If your health bar drops below 30% and your defensive cooldowns are active, the best tactical move is to retreat to the edge of the combat zone. AI enemies in this game often have tether ranges; pulling them toward the edge of the map can sometimes cause them to de-aggro or split up, allowing you to pick them off one by one.
Furthermore, always evaluate the "Elemental Compatibility" of the upcoming wave before starting a mission. If you see an enemy formation that counters your current primary dragon, adjust your loadout in the prep screen. Neglecting this preparation phase is the most common reason new players hit a "difficulty wall" in the middle chapters. By combining smart loadout choices with the fluid 3D movement techniques outlined above, you will find that even the most formidable enemy formations become manageable. Constant practice of these maneuvers will transform you from a novice rider into a legendary Dragon Knight.

James Brown
James focuses on Android gaming on PC, emulator setup, controls, performance tuning, and practical troubleshooting for longer play sessions.
COMMUNITY
Player Comments
104 players commented on this guide.
I wish I had read this before upgrading the wrong thing.
Can you add more details about strategy in a future update?
Nice guide. I am checking the other HOT articles next.
This helped me understand strategy much better.