
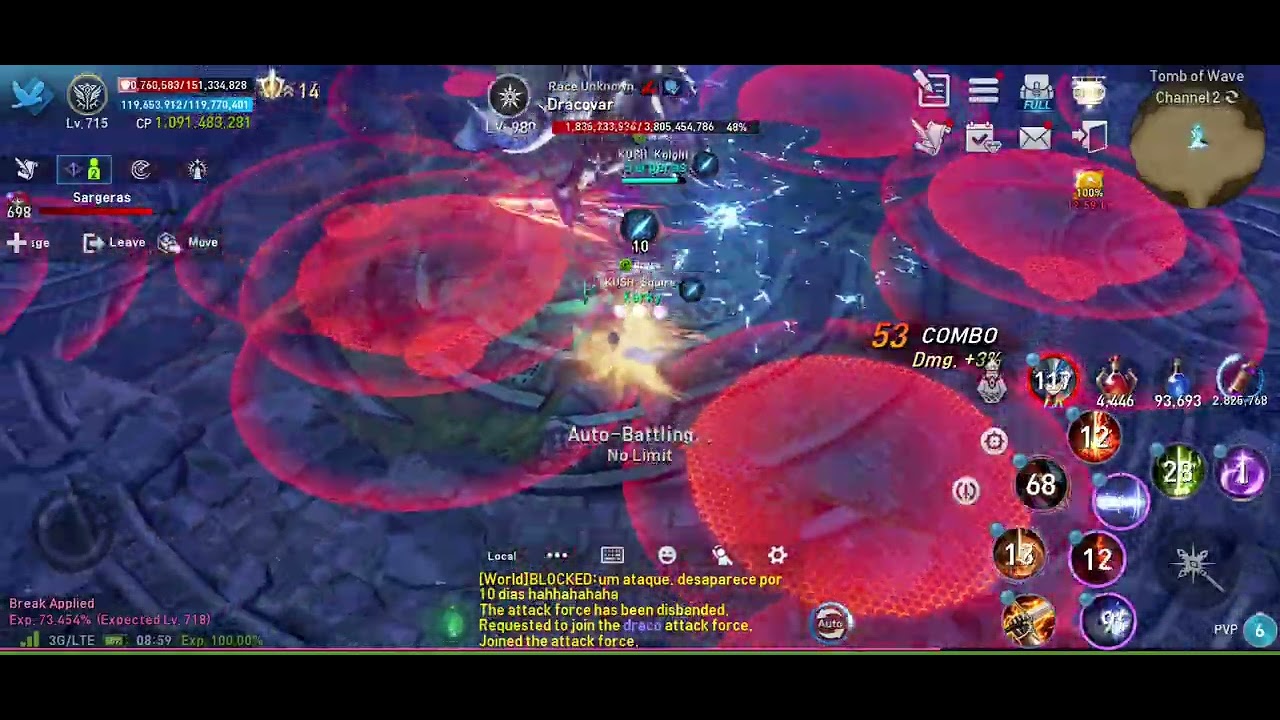
To defeat the World Boss Dracovar in Lineage 2: Revolution and secure top-tier contribution rewards, stand along the dragon's side flanks, switch off full auto-combat, and equip gear with Draconic attribute bonuses. Surviving the entire fight is essential because dying eliminates active damage uptime and drastically reduces your final loot ranking.
Gear and Combat Preparation
Equipping Draconic attribute weapons and armor provides direct percentage-based damage amplification and damage reduction against Dracovar's dragon-type classification. General field-farming equipment and PvP sets lack these targeted multipliers and will lower your overall damage per second (DPS).
Prepare your character before entering the arena:
- Attribute Gear: Equip Draconic weapons to boost your offensive output and Draconic armor to soften incoming physical and magical hits.
- Soul Crystals: Slot Critical Damage, Physical or Magical Attack, and Resilience soul crystals to balance damage output with survivability.
- Skill Deck: Select sustained single-target attacks, self-preservation evasives, and party-wide offensive buffs instead of broad area-of-effect mob skills.
- Consumables: Activate Clan Feast buffs, personal combat scrolls, and set automated potion consumption to trigger at 70% health.
- Combat Mode: Switch your combat controls to manual or semi-auto to stop your character from automatically walking into red ground hazards.
Boss Positioning and Hazard Evasion
Positioning behind Dracovar's side ribs protects you from both his lethal frontal breath attack and his rear tail swipes. A designated tank should face Dracovar directly away from the rest of the raid group, establishing a clear flank for melee and ranged attackers.
| Boss Indicator Area | Danger Level | Recommended Evasion Movement |
|---|---|---|
| Frontal Cone (Breath Attack) | Lethal | Dash through Dracovar toward his flank or dodge laterally out of the cone. |
| Rear Sector (Tail Swipe) | Moderate | Step forward toward his side ribs to avoid knockback interruption. |
| Full-Circle Ground Indicator | High | Disengage immediately outward or trigger an invulnerability skill before impact. |
| Targeted Impact Rings | Moderate | Spread away from teammates to prevent stacking overlapping splash damage. |
When ground telegraphs appear, cancel skill animations immediately with your evasion roll or movement pad rather than waiting for skill casts to finish.
Role Execution and Aggro Shifts
Maintaining party roles stabilizes the battle line and prevents unexpected party wipes during phase shifts.
- Tanks: Anchor the boss in place facing away from the group. If Dracovar breaks aggro during a leap or slam, quickly re-engage and reorient his facing direction before damage dealers unleash heavy skills.
- Healers: Classes such as Bishop or Eva's Elder should hold large burst heals and party shields until right after Dracovar executes a major full-circle area attack, rather than wasting cooldowns on minor chip damage.
- Ranged Attackers: Maintain maximum attack distance near support auras while keeping open routes toward the outer perimeter to escape targeting rings.
- Kiting Resets: If an aggro reset causes Dracovar to target a non-tank player, that player must kite him in a tight, steady circle rather than sprinting across the map, allowing the vanguard to regain threat without disrupting raid positioning.
Maximizing Contribution Score
Loot distribution scales directly with your cumulative contribution score, which tracks damage dealt, damage mitigated, and party support output. Dying forces you to spend red diamonds on instant resurrections or make a lengthy run back from the spawn point, either of which sharply reduces your ranking relative to surviving players. Focus on dodging lethal indicators and maintaining high attribute-based damage uptime to secure Dracovar's top reward brackets.

Free Lineage 2: Revolution Codes
Current active codes and how to redeem them.

Sarah Williams
Sarah specializes in RPG and collection games, explaining team building, character growth, and beginner-friendly ways to avoid expensive early mistakes.
COMMUNITY
Player Comments
124 players commented on this guide.
I wish I had read this before upgrading the wrong thing.
I tried this today and it worked better than my old setup.
This guide answered the exact question I had.
This helped me understand strategy much better.