
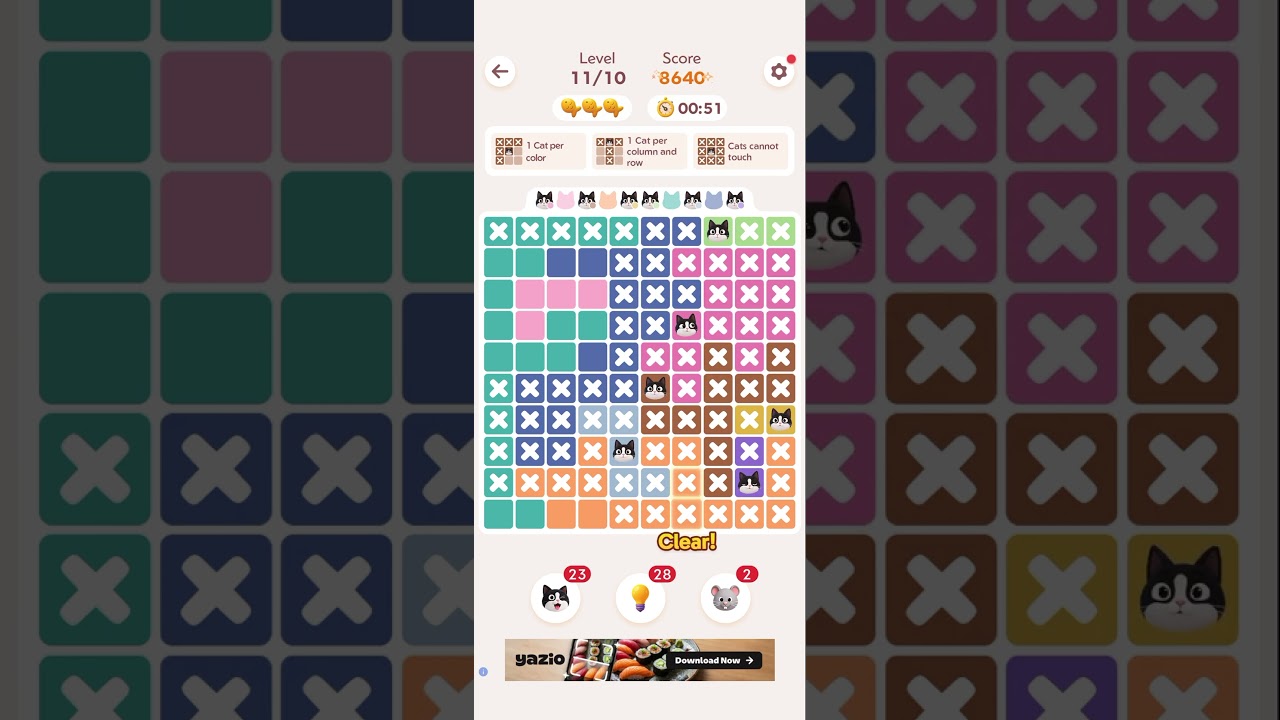
To solve the Meowdoku!! November 10 Daily Challenge without failing the three-mistake limit, place crosses in restricted corner and edge cells before committing cats to the central grid. Eliminating empty perimeter spaces first narrows down valid candidate positions across multi-row regions and prevents accidental strikes.
Daily Board Rules and Placement Quotas
The November 10 puzzle operates on standard Star Battle mechanics, where every cell placement affects intersecting rows, columns, and outlined territories.
| Element | Placement Rule | Board Impact |
|---|---|---|
| Line Quotas | Exactly two cats per row and column | Filling two cats in a line immediately clears all remaining empty cells with crosses. |
| Region Quotas | Exactly two cats per outlined territory | Territory boundaries spanning multiple lines restrict how neighboring lines share cats. |
| Adjacency Bubble | 8-cell exclusion radius | Placing a cat automatically blocks all eight adjacent squares, including diagonals. |
| Mistake Penalty | Three-strike failure limit | Guessing risks forfeiting daily streak progress; every mark must be deduced mathematically. |
Perimeter and Corner Eliminations
Begin your solve on the outer edges of the grid. Boundary walls naturally reduce available adjacent spaces, making cell conflicts easier to spot.
- Corner intersections: A corner cell that borders a narrow two-cell region boundary cannot support two independent cats without violating diagonal spacing. Mark these invalid corner spaces with crosses immediately.
- Constrained edge rows: When an exterior row contains only three or four open cells divided across an outlined boundary, calculate whether placing a cat on the outer rim starves the rest of the row. If placing an outer cat leaves fewer viable cells than the territory quota demands, cross out that perimeter tile.
Resolving L-Shapes and Linear Corridors
Irregular geometric sections on the November 10 board allow you to eliminate candidates before locking in a single cat.
- Compact L-patterns: When an outlined territory forms an L-shape across two rows and two columns, test the interior corner square. If placing a cat on that inside bend eliminates adjacent tiles required to fulfill the region quota, place a cross on the inside corner.
- Three-cell straight runs: If a single region contains a linear stretch of three cells and requires only one cat from that specific section, evaluate the middle tile. Crossing out a center tile is required when placing a cat there would invalidate both flanking spaces and break region requirements.
Resolving the Central Bottleneck
Once outer rows are trimmed, the intersecting central rooms create a tight squeeze where colored regions overlap across middle rows and columns. Resolve this area using a strict deduction sequence:
- Tally remaining candidates: Count the open squares across converging central rows rather than looking at individual cells.
- Track shared regional quotas: Identify colored regions that cross both rows to see how many shared cats will sit inside that combined block.
- Cross out external row cells: If a two-row block must contain four cats and three of them are trapped within a shared territory, mark crosses across every cell outside that territory in both rows.
- Place forced cats: When an active row or column drops to exactly two open candidate spaces, place the cats and cross out all eight surrounding cardinal and diagonal tiles.
Final Row and Column Verification
Before placing the final two cats to claim the November 10 paw stamp, confirm that your target placements do not conflict with existing vertical lines. Rushing the final moves frequently causes line overflows or diagonal touches. Check that every column contains exactly two cats, that all outlined territories meet their quotas, and that no two cats share a diagonal corner before submitting the closing marks.

Free Meowdoku! Codes
Current active codes and how to redeem them.

Michael Smith
Michael covers live-service games, events, reward systems, and efficient daily routines, turning frequent updates into clear actions for players.
COMMUNITY
Player Comments
157 players commented on this guide.
This helped me understand strategy much better.
This saved me time in the early game.
I tried this today and it worked better than my old setup.
Can you add more details about strategy in a future update?