
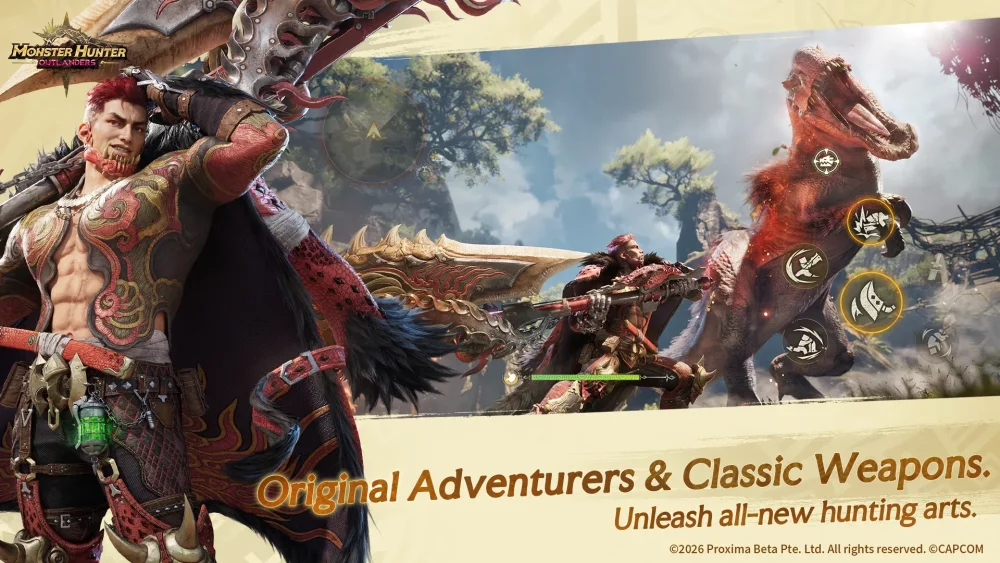
In Monster Hunter Outlanders, the Bow stands out as a premier weapon for players who favor high-speed movement and precise, reactive combat. Unlike the weightier melee options that demand commitment to long attack animations, the Bow allows for a fluid, aggressive playstyle that turns the hunter into a mobile turret. Success with this weapon requires more than just good aim; it demands mastery of the "evade-and-counter" loop, where every dash is used to both avoid danger and maintain your maximum damage potential.
The Mechanics of Dash-Canceling and Mobility
The core of Monster Hunter Outlanders Bow gameplay is the dash-evade. This maneuver is not merely a defensive tool; it is the engine that drives your offensive output. When you fire a shot, you are often locked in a short recovery window. By inputting a dash immediately after an attack, you cancel that animation, allowing you to reposition instantly.
- The Evade-Counter Loop: Time your dash to coincide with the monster’s attack telegraph. By dodging through a monster’s swipe, you remain within optimal range and can immediately fire a follow-up shot.
- Momentum Maintenance: Using a dash-evade allows you to transition seamlessly between shots without resetting your charge level. This fluid movement makes the Bow one of the safest weapons in the game, provided you can maintain the rhythm.
Mastering Charge Levels for Peak Damage
The Bow’s damage is gated by its charge level, a multiplier that increases with each consecutive shot. If you stop attacking, the charge level resets, forcing you to begin the build-up process again. To maximize your DPS, you must treat your engagement as a continuous flow.
- Opening Sequence: Use standard, uncharged shots to initiate combat and draw the monster’s attention or create space.
- Ramping Up: Rapidly fire consecutive shots to climb through the charge tiers.
- Sustenance: Once at max charge, utilize dash-evades to keep the weapon energized while repositioning. Avoid standing still for too long; a static Bow user is a vulnerable target.
By effectively managing these phases, you ensure that every arrow hitting the monster’s weak point is dealing the maximum possible damage percentage. This is critical for breaking parts quickly and forcing monsters into "flinch" states.
Staying in the Sweet Spot: Critical Distance
Even with top-tier reflexes, your damage output will plummet if you ignore "critical distance." This mechanic defines the specific range where your shots hit with full force.
- Too Far: Arrows lose velocity and damage, resulting in ineffective pokes.
- Too Close: You risk being hit by melee attacks and may lose the ability to kite effectively.
- The Reticle Cue: Use the targeting reticle as your primary guide. In Monster Hunter Outlanders, the reticle will often shift or change color when you are within the optimal damage zone. Adjust your movement constantly to keep your target within this "sweet spot," treating the monster's weak points as magnets for your crosshair.
Tactical Trade-offs and Stamina Management
Stamina is the most precious resource for a Bow user. Every dash-evade and every charged shot depletes your stamina bar. If you empty your stamina, you lose your primary defensive tool, leaving you susceptible to high-damage monster abilities.
- The Stamina Buffer: Never fully deplete your bar unless you are certain the monster is incapacitated (e.g., trapped or knocked down). Always aim to keep a small buffer of stamina available for an emergency dodge.
- Learning Telegraphs: By studying the specific attack patterns of bosses like the Radiant Prismatic Dragon, you can identify when it is safe to burn stamina for damage and when you must conserve it for survival. Minimizing "panic dashing" is the sign of an expert player.
Optimizing Strategies for Solo and Cooperative Hunts
Your role changes depending on whether you are hunting alone or with a squad. Understanding these nuances is key to consistent performance.
Cooperative Play
In a group, your goal is to act as a "support-DPS" hybrid. Because the monster is likely distracted by your teammates, you have more freedom to position yourself for high-value targets. Focus on hitting hard-to-reach weak points, such as wings or tails, that melee players might struggle to access. Your ability to provide consistent ranged pressure allows your team to focus on heavier, slower attacks.
Solo Hunts
In solo play, you are the primary target. You must master the art of "kiting"—forcing the monster to chase you across the arena. By keeping the monster moving, you create predictable patterns that you can exploit. Use your superior mobility to lead the monster into open areas, avoiding cramped corners where your movement options are restricted.
Common Mistakes to Avoid
Many players struggle with the Bow because they treat it like a traditional sniper rifle. To elevate your gameplay, avoid these common pitfalls:
- Over-committing: Do not try to reach max charge if the monster is actively targeting you with a high-damage attack. It is always better to dash and reset your charge than to get hit.
- Ignoring Part-Breaking: The Bow is exceptionally precise. Use your mobility to focus fire on specific limbs or heads to break parts, rather than just firing into the monster's center mass.
- Neglecting Settings: Ensure your camera sensitivity and control settings are optimized for high-speed tracking. In Monster Hunter Outlanders, the ability to quickly snap your camera to a weak point after a dash is what separates elite players from beginners.
By focusing on fluid movement, disciplined stamina management, and strict adherence to critical distance, you will find that the Bow is one of the most versatile and rewarding weapons in Monster Hunter Outlanders. Practice these rotations in low-stakes hunts until the dash-evade becomes muscle memory, and you will soon find yourself dictating the pace of every battle.

Free Monster Hunter Outlanders Codes
Current active codes and how to redeem them.

Michael Smith
Michael covers live-service games, events, reward systems, and efficient daily routines, turning frequent updates into clear actions for players.
COMMUNITY
Player Comments
86 players commented on this guide.
Nice guide. I am checking the other Monster Hunter Outlanders articles next.
I wish I had read this before upgrading the wrong thing.
The tips are practical and easy to follow.
Can you add more details about strategy in a future update?