
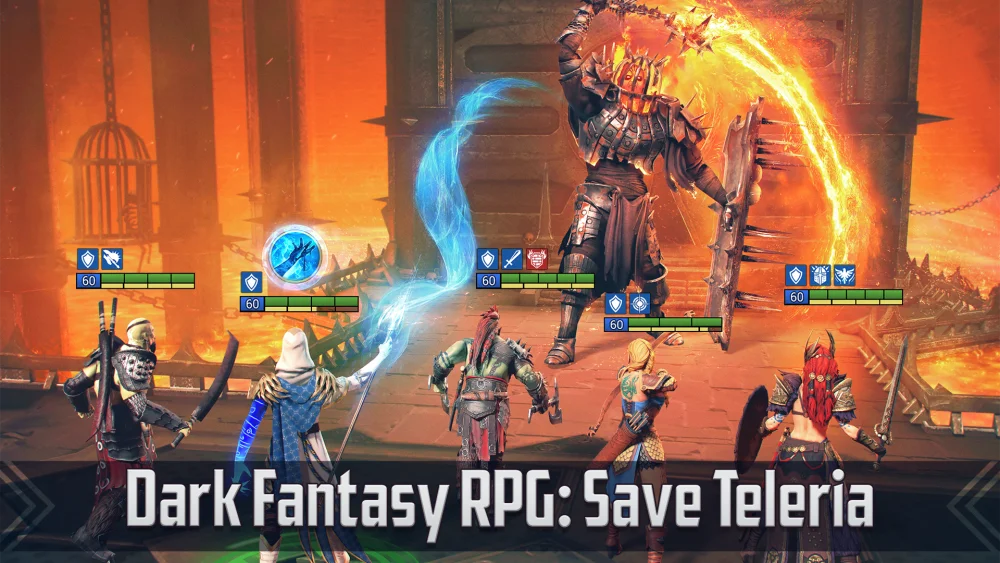
The Forge in RAID: Shadow Legends is one of the most powerful tools for accelerating account progression. Unlike random dungeon drops, the Forge gives players direct control over gear sets, piece rarity, and stat distributions. However, crafting gear one item at a time often leads to wasted resources, depleted Silver, and low-tier artifacts that fail to improve your Champions.
To maximize gear quality and account progression, the optimal approach is mass material hoarding combined with targeted batch crafting. By accumulating materials from Faction Wars, Doom Tower, Arena, and Events over weeks or months, you can execute massive crafting sessions. This method smooths out Random Number Generator (RNG) variance, allows efficient charm usage, and synergizes with Clan vs Clan (CvC) matches and Artifact Enhancement Events.
---
How the Forge Works in RAID: Shadow Legends
Crafting high-end artifacts in RAID: Shadow Legends requires balancing three primary resources: Base Materials, Secondary/Raid Materials, and Charms. Understanding how these components interact is necessary before spending hard-earned resources.
+-----------------------------------------------------------------------+
|                         FORGE CRAFTING SYSTEM                         |
+-----------------------------------------------------------------------+
|  Base Materials          +  Secondary Materials    +  Silver Cost     |
|  (Magisteel, Corehammer)    (Doom Tower / FW)      (Per-piece fee)    |
+-----------------------------------------------------------------------+
                                   |
                                   v
+-----------------------------------------------------------------------+
|                       OPTIONAL CHARM MODIFIERS                        |
|  [Rank Charm]    [Rarity Charm]    [Type Charm]    [Substat Charm]    |
|  (Boosts 6-Star) (Boosts Legend)   (Target Slot)   (Target Substat)   |
+-----------------------------------------------------------------------+
                                   |
                                   v
+-----------------------------------------------------------------------+
|                            CRAFTED ARTIFACT                           |
|                  (Filtered via Auto-Sell / Manual Roll)               |
+-----------------------------------------------------------------------+
Material Hierarchy
- Base Materials (Magisteel & Corehammers): Used across almost all recipes. Magisteel drops routinely from Faction Wars and Arena, while Corehammers are earned through Clan Boss, Events, and Advanced Quests.
- Specific Set Materials: Exclusive items tied to specific content. For example, Bloodthirst requires materials from Grim Forest/Doom Tower, while Perception requires materials earned directly from Faction Wars.
- Crafting Tiers (4–5 Star vs. 5–6 Star): Early-game accounts may rely on 4–5 Star crafts, but mid-to-late game players should exclusively target 5–6 Star crafts. Crafting 4–5 Star gear quickly burns through base materials without delivering endgame-viable pieces.
---
The Power of Mass Material Hoarding
Resisting the urge to craft gear as soon as materials land in your inbox is key to efficient progression. Single, isolated crafts frequently yield flat-stat artifacts, leaving accounts starved of usable pieces.
1. Smoothing Out RNG Variance
Every artifact crafted must roll multiple probabilistic layers:
- Slot Placement: Weapon, Helmet, Shield, Gauntlets, Chestplate, Boots.
- Primary Stat: Percentage vs. Flat stats on bottom-row items (Gauntlets, Chest, Boots).
- Rarity: Rare, Epic, or Legendary.
- Substat Selection: Speed, Accuracy, Resistance, Crit Rate, Crit Damage, Percentage Stats, or Flat Stats.
When crafting 5 pieces, the odds of hitting a Legendary 6-Star piece with matching percentage substats and Speed are statistically low. When crafting 100 to 200 pieces of a single set, probability works in your favor. You are guaranteed a statistically representative spread of rolls, yielding multiple top-tier pieces per session.
2. Maximizing Event and CvC Points
Executing mass crafting sessions during active events provides significant dual-value:
- Clan vs. Clan (CvC) Competitions: Crafting 5-Star and 6-Star Epic or Legendary gear generates massive points for your Clan without spending extra Energy.
- Artifact Enhancement & Crafting Events: Batch crafting during these windows allows you to easily fulfill point thresholds for valuable rewards like Legendary Skill Tomes, Energy refills, and Soulstones.
---
Priority Forge Sets Ranked by Account Value
Not all Forge sets in RAID: Shadow Legends offer equal utility. Focus your primary material accumulation on sets that provide immediate game-wide utility over situational options.
| Set Name | Tier | Source Content | Key Effects | Target Champions |
|---|---|---|---|---|
| Perception | S-Tier | Faction Wars | +40 Accuracy, +5% Speed (2-pc) | Debuffers, Turn Meter Control, Support |
| Lethal | S-Tier | Doom Tower | +15% Crit Rate, Ignores 25% DEF (4-pc) | Arena Nukers, Campaign Farming |
| Defiant | S-Tier | Forge Pass / Events | +10% DEF, Reduces AoE Damage Taken by 15% (2-pc) | Clan Boss Roster, Dungeon Tanks |
| Righteous | S-Tier | Events / Live Arena | +10% Speed, +40 RES (2-pc) | Speed Tunes, Cleaners, Support |
| Bolster | A-Tier | Forge Pass / Events | 30% Protected HP Shield (3 Turns), +15% HP (4-pc) | Arena Defense, High-HP Support |
| Resilience | B-Tier | Faction Wars | +10% HP, +10% DEF (2-pc) | Early/Mid-Game Tanks, General PvE |
| Afflection | C-Tier | Arena / Events | Adds Accuracy based on target RES | Niche PvP Debuffers |
Top Focus: Perception & Defiant Sets
- Perception: The undisputed king of accessible gear. Because it grants both Accuracy and Speed in a 2-piece set, it is essential for almost every Turn Meter manipulator, crowd controller, and debuffer in the game.
- Defiant: Exceptional for Clan Boss survival (Unkillable and Traditional compositions alike) and High-Tier Dungeons (Hard Mode Spider/Dragon), reducing incoming Area-of-Effect damage while stacking Defense.
---
Strategic Charm Management
Charms allow you to manipulate the RNG of the Forge. Because Charms are limited, burning them on low-tier crafts is a common pitfall.
                    +-----------------------------+
                    |    CHARM TYPES & USAGE      |
                    +-----------------------------+
                                   |
        +------------------+-------+-------+------------------+
        |                  |               |                  |
        v                  v               v                  v
  [Rank Charm]      [Rarity Charm]   [Type Charm]      [Substat Charm]
  Boosts 6-Star     Boosts Legend    Targets Slot      Targets Substat
  Chance (Up to 50%) Chance (Up to 50%) (Boots, Chest)  (Speed/Acc/Crit)
        |                  |               |                  |
        +------------------+-------+-------+------------------+
                                   |
                                   v
                    +-----------------------------+
                    |   MAXIMUM CRAFT POTENTIAL   |
                    +-----------------------------+
1. Rank Charms (6-Star Boosters)
- Rule: Never use 6-Star Rank Charms on 4–5 Star recipes. Save them strictly for 5–6 Star crafts.
- Best Use: Apply Rank Charms during mass crafts of high-value sets like Lethal, Perception, and Defiant.
2. Rarity Charms (Epic/Legendary Boosters)
- Rule: Pair Rarity Charms with Rank Charms. Boosting the chance of a Legendary roll is wasted if the item lands as a 5-Star piece on a endgame account.
- Best Use: Reserve Legendary Rarity Charms for top-tier DPS and Damage-mitigation sets (Lethal, Bolster, Righteous).
3. Type Charms (Slot Selection)
- Boots: Use Type Charms to target Boots when hunting for Speed primary stats.
- Chestplates/Gauntlets: Target these slots when searching for HP%, DEF%, Crit Rate, or Crit Damage primaries.
- Weapons/Helmets/Shields: Use Type Charms on top-row gear only when you need immediate substat chasing (e.g., fishing for triple/quad Speed rolls on a Perception Weapon), as top-row items feature fixed primary stats.
4. Substat Charms
- Priority Substats: Speed > Accuracy > Crit Rate > Crit Damage.
- Synergy: Match Substat Charms with the set role. Use Speed or Accuracy Charms on Perception crafts; use Crit Rate or Crit Damage Charms on Lethal crafts.
---
Step-by-Step Mass Crafting Execution
To make the most of your mass crafting sessions in RAID: Shadow Legends, follow this step-by-step process.
+-----------------------------------------------------------------------+
|                     MASS CRAFTING SESSION WORKFLOW                    |
+-----------------------------------------------------------------------+
|  Step 1: Silver & Storage Prep                                       |
|  - Reserve 10M+ Silver                                                |
|  - Clear 100+ Artifact Storage Slots                                  |
+-----------------------------------------------------------------------+
                                   |
                                   v
+-----------------------------------------------------------------------+
|  Step 2: Auto-Sell Filter Setup                                       |
|  - Check 4-Star Gear (Always Sell)                                    |
|  - Check Flat Stat Bottom-Row Pieces (ATK/DEF/HP)                     |
+-----------------------------------------------------------------------+
                                   |
                                   v
+-----------------------------------------------------------------------+
|  Step 3: Apply Charms & Mass Craft                                    |
|  - Load Rank, Rarity, Type, and Substat Charms                       |
|  - Execute 10x Batch Crafts                                           |
+-----------------------------------------------------------------------+
                                   |
                                   v
+-----------------------------------------------------------------------+
|  Step 4: Roll & Purge Protocol                                        |
|  - Level keep-candidates to +4 or +8                                  |
|  - Sell low-roll or mismatched substat items                          |
+-----------------------------------------------------------------------+
Step 1: Accumulate Silver and Inventory Space
Mass crafting requires substantial Silver. Crafting 100 pieces of 5–6 Star gear costs several million Silver in base crafting fees, not including the millions needed to level up and test sub-stats afterward.
- Silver Cushion: Maintain at least 10,000,000 Silver before embarking on a 100+ item crafting session.
- Vault Space: Clear out at least 100–150 slots in your Artifact Storage. Running out of space mid-craft breaks momentum and risks inbox clutter.
Step 2: Configure Auto-Sell Filters
Before clicking craft, set up the in-game Forge Auto-Sell options:
- Sell all Rare (Blue) 5-Star gear unless crafting entry-level accounts.
- Sell all bottom-row items (Gauntlets, Chestplates, Boots) with Flat ATK, Flat DEF, or Flat HP primary stats.
Step 3: Execute Batch Crafts with Charms
- Select your target set (e.g., Perception).
- Select the 5–6 Star recipe tier.
- Load a Rank Charm, a Rarity Charm, and a Substat Charm (e.g., Speed).
- Run the crafts using 10x batch execution to rapidly generate large sample sets.
---
Gear Evaluation: What to Keep vs. What to Sell
Once gear is crafted, strict filtering ensures your inventory remains clean and high-performing.
                  +-----------------------------------+
                  |  CRAFTED ARTIFACT EVALUATION FLOW |
                  +-----------------------------------+
                                    |
                                    v
                  /-----------------------------------\
                 /    Is Bottom-Row Primary Flat ATK,  \--- YES ---> [ SELL IMMEDIATELY ]
                 \            DEF, or HP?             /              (Except Speed Boots)
                  \-----------------------------------/
                                    |
                                   NO
                                    v
                  /-----------------------------------\
                 /    Does piece lack Speed, ACC, or   \--- YES ---> [ SELL FOR SILVER ]
                 \     Synergistic Percentage Subs?    /
                  \-----------------------------------/
                                    |
                                   NO
                                    v
                  +-----------------------------------+
                  |      ROLL PIECE TO LEVEL +4/+8    |
                  +-----------------------------------+
                                    |
                                    v
                  /-----------------------------------\
                 /     Did upgrades hit Flat Stats     \--- YES ---> [ SELL / RECYCLE ]
                 \        or Low Percentage Subs?     /
                  \-----------------------------------/
                                    |
                                   NO (Double/Triple Hits on Speed/ACC/Crit)
                                    v
                  +-----------------------------------+
                  |  KEEP & UPGRADE TO +12 / +16      |
                  +-----------------------------------+
1. Instant Sell Criteria
Sell items immediately if they match any of these baseline conditions:
- Flat Primary Stats on Bottom-Row Gear: Any Gauntlet, Chestplate, or Boot with Flat HP, Flat DEF, or Flat ATK primary stats should be sold instantly. Exception: Boots with Speed as a primary stat are always kept regardless of substats.
- Low-Star Tier: 4-Star pieces have no long-term value in mid-to-late game content.
- Mismatched Substats: Offensive sets like Lethal or Cruel that roll multiple defensive flat substats (e.g., Resistance + Flat DEF) without Crit Rate or Speed should be salvaged.
2. The Roll Testing Protocol (+4 and +8 Rule)
Do not take newly crafted artifacts straight to Level 16. Leveling items to +16 is a major Silver drain. Follow this upgrade path:
- Roll to Level 4: Check where the first substat upgrade lands. If it hits a flat stat, reconsider keeping the piece. If it hits Speed, Accuracy, or Crit Rate, proceed.
- Roll to Level 8: If an item fails to get a "Double Roll" (2 upgrade hits in a desirable stat like Speed or Crit Rate), sell it.
- Roll to Level 12: Only take items to +12 if they have secured Double or Triple rolls into key stats.
- Final +16 Upgrades: Reserve Level 16 upgrades for pieces with confirmed Triple or Quad rolls, or clean Double rolls with high base percentage stats that fill an immediate gear gap on an active Champion.
---
Common Forge Crafting Mistakes to Avoid
- Crafting Single Pieces Daily: Spending 10 Magisteel every day prevents you from capitalizing on high-volume Charm combinations, CvC point rushes, and Artifact Enhancement Events.
- Wasting Charms on Low-Tier Gear: Putting a Legendary Rarity Charm into a 4–5 Star craft is one of the most common resource wastes in RAID: Shadow Legends. Save top Charms for 5–6 Star options exclusively.
- Ignoring Substat Synergy for Set Bonuses: A broken gear combination with high Speed, high Accuracy, and double/triple percentage rolls will outperform a completed set bonus made of weak or flat-stat gear. Never keep a bad artifact just because it belongs to a good set.
- Neglecting Silver Budgeting: Running out of Silver mid-session leaves your vault full of unrolled +0 artifacts, clogging storage and preventing you from gearing Champions for upcoming battles.
---
Summary Checklist for Maximum Forge Efficiency
To keep your account progression steady, use this operational checklist before starting any major Forge session in RAID: Shadow Legends:
- [ ] Hoard Materials: Accumulate base materials for 3–4 weeks prior to a major CvC or Artifact Event.
- [ ] Clear Vault Space: Ensure 100+ free slots in primary Artifact Storage.
- [ ] Prepare Silver: Reserve a minimum of 10M Silver for crafting fees and sub-stat roll tests (+4/+8 checks).
- [ ] Select Core Sets: Focus strictly on high-impact sets (Perception, Lethal, Defiant, Righteous).
- [ ] Equip Charms: Match 6-Star Rank Charms, Legendary Charms, and Speed/Accuracy Substat Charms.
- [ ] Apply Auto-Sell Rules: Filter out 4-Star items and flat primary stats on Gauntlets, Chests, and Boots.
- [ ] Audit & Test Rolls: Upgrade promising pieces to +4/+8, selling items that miss key Speed, Accuracy, or Damage rolls.
Free RAID: Shadow Legends Codes
Current active codes and how to redeem them.

James Brown
James focuses on Android gaming on PC, emulator setup, controls, performance tuning, and practical troubleshooting for longer play sessions.
COMMUNITY
Player Comments
93 players commented on this guide.
Good guide for RAID: Shadow Legends players. The strategy part was useful.
The tips are practical and easy to follow.
The explanation is clear, especially for beginners.
I tried this today and it worked better than my old setup.