
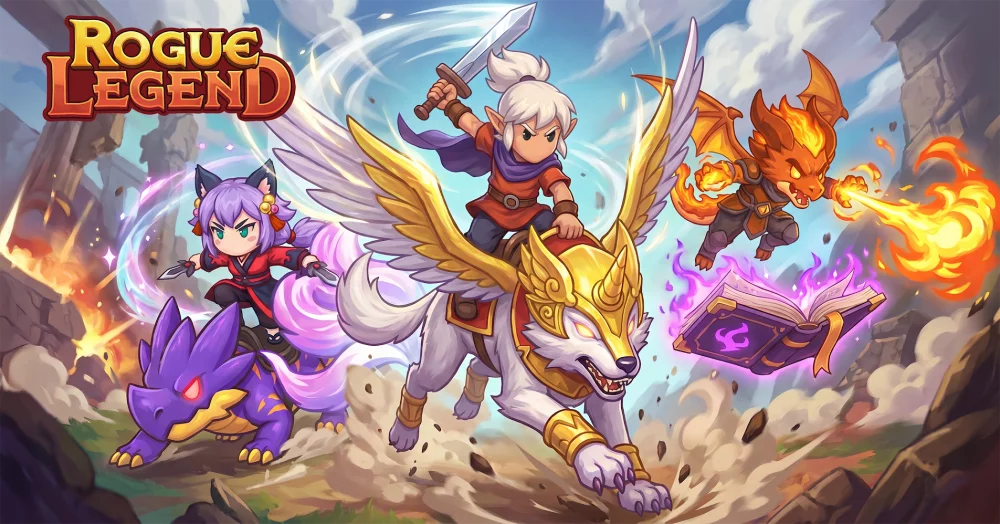
The Two-Headed Orc Boss at the end of Chapter 2 in Rogue Legend serves as the game’s first major skill check. Transitioning from early board encounters into this high-intensity arena battle requires precise positioning, strict stamina and cooldown management, and an understanding of broad hitboxes. The boss pairs slow, devastating area-of-effect swings with rapid lunging strikes, punishing greedy damage rotations and sloppy positioning.
To beat the Two-Headed Orc, you must employ a disciplined hit-and-run playstyle. By identifying telegraph animations early, maintaining control of the arena center, and sync-bursting your damage skills during the boss's recovery windows, you can clear Chapter 2 reliably regardless of your starting build.
---
Quick-Reference Combat Overview
| Combat Metric | Details & Recommended Values |
|---|---|
| Encounter Location | Rogue Legend Chapter 2 Boss Tile |
| Primary Damage Type | Heavy Physical (Cleave, Slam, Charge) |
| Key Vulnerability | Long recovery frames post-Overhead Slam |
| Recommended Deck Strategy | High mobility cards, instant-cast damage spells, single-target burst |
| Arena Hazard | Narrow perimeter walls and corner choke points |
---
Pre-Fight Preparation: Cards, Relics, and Node Choices
Before locking in your route to the Chapter 2 boss node in Rogue Legend, optimize your deck composition and item setup to counter physical melee pressure.
       [ Encounter Node Selection ]
                  │
        ┌─────────┴─────────┐
        ▼                   ▼
 [ Elite Combat ]    [ Campfire Node ]
  • Grab Burst Cards  • Upgrade Mobility
  • Acquire Relics    • Heal / Purge Deck
        └─────────┬─────────┘
                  ▼
    [ Chapter 2 Boss Encounter ]
Card Selection and Deck Trimming
- Prioritize Mobility: Ensure your deck contains at least two low-cost mobility or dash cards. You will need quick movement options that do not drain your main action points or mana pool.
- Purge Slow Wind-Up Abilities: Remove high-cost cards with long casting animations. The Two-Headed Orc recovers fast enough to counter slow spells, leading to unfavorable damage trades.
- Include Single-Target Burst: The encounter features a single massive threat. Area-of-effect (AOE) damage cards lose efficiency here; swap them out for single-target vulnerability debuffs or raw physical/elemental burst.
Relic Synergy
Aim for relics that grant movement speed bonuses, damage mitigation on dodge, or energy restoration upon dodging heavy strikes. Relics that trigger effects when an enemy is stunned or staggered provide extra value, as the Orc can be interrupted during specific phase shifts.
---
Decoding the Two-Headed Orc’s Attack Telegraphs
The Two-Headed Orc uses a distinct set of physical attacks. Recognizing the subtle animation cues for each head allows you to react before the damaging hitboxes deploy.
      [ Boss Telegraph Cues ]
                 │
  ┌──────────────┼──────────────┐
  ▼              ▼              ▼
[ Left Head ]  [ Right Head ] [ Both Heads ]
 Raised Club    Low Swipe      Bellow / Roar
 (Overhead)     (Horizontal)   (Phase Shift)
  │              │              │
  ▼              ▼              ▼
 Side Dodge    Back Dash      Disengage
1. The Horizontal Dual-Cleave
- Telegraph: The right head snarls while the Orc draws its primary weapon back horizontally across its chest, lowering its stance slightly.
- Hitbox & Danger: A 180-degree forward sweep covering a wide radius in front of the boss.
- Counter Tactics: Do not backpedal in a straight line, as the sweep range is wider than standard walking speed. Instead, dodge horizontally toward the boss’s off-hand side to pass under the arc, positioning yourself behind the boss to attack safety.
2. Dual-Club Overhead Slam
- Telegraph: Both heads roar simultaneously while the boss raises its weapon high above its shoulders with both hands, pausing for approximately 1.5 seconds.
- Hitbox & Danger: A forward linear strike that sends a shockwave down the center line of the arena. This attack deals massive damage and causes a knockdown status effect.
- Counter Tactics: Sidestep immediately when the weapon reaches its apex. The shockwave travels far, so vertical distance will not protect you. Sidestepping sets up your primary damage window while the weapon remains stuck in the ground.
3. Bull Charge / Stampede
- Telegraph: The left head lowers its eyes, and the Orc scrapes its foot on the ground twice before lowering its shoulder toward your position.
- Hitbox & Danger: A rapid linear charge across the arena floor that pins and drags your character if caught.
- Counter Tactics: Wait until the Orc starts its forward rush before dodging perpendicular to the path. If you dodge too early, the charge will track your new position. Aim to guide the Orc toward arena walls to cause a brief self-stun upon impact.
4. Two-Headed Bellow (AOE Knockback)
- Telegraph: Both heads throw their heads back and compress their chest.
- Hitbox & Danger: A short-range circular pulse that deals minor damage, knocks back close players, and interrupts active card castings or channel spells.
- Counter Tactics: Save your dash abilities to clear out of the immediate red circle that expands around the boss's feet.
---
Arena Mobility and Spatial Control
Combat space management in Rogue Legend determines whether you survive Chapter 2. The boss arena is a bounded square board with stone pillars and boundary walls that can work for or against you.
+-----------------------------------+
|             ZONE A                |
|       (Avoid Corner Traps)        |
|                                   |
|   ZONE B               ZONE B     |
| (Kiting Path)        (Kiting Path)|
|             [ ORC ]               |
|                                   |
|             ZONE C                |
|          (Safe Zone)              |
+-----------------------------------+
Maintaining Center-Board Trajectory
Never stand near the perimeter edges or corners of the board. The Two-Headed Orc’s large body can easily body-block your escape routes, trapping you in a corner where you will absorb consecutive cleave attacks. Always path around the boss in a concentric circle, keeping the center of the board behind your character.
Exploiting Pillars and Obstacles
Position environmental pillars between yourself and the boss when you need to drop aggro, heal, or cycle through your hand cards.
- Baiting Charges: Stand directly in front of a pillar when the Orc telegraphs its charge, then dodge away right before impact. The boss will slam into the structure, suffering a 2.5-second stun that gives you a damage window.
- Line-of-Sight Breaking: Use structural geometry to block the shockwave portion of the Overhead Slam if you lack stamina to dodge clear.
---
Phase-by-Phase Battle Walkthrough
[ Phase 1: 100% - 60% HP ]
  └─ Steady Kiting, Learn Telegraphs, Save Cooldowns

[ Phase Shift: 60% HP Threshold ]
  └─ Enrage Roar, Ground Shockwave, Speed Boost

[ Phase 2: 60% - 0% HP ]
  └─ Dual Attack Chains, Reduced Recovery Windows, Stun Baiting
Phase 1: Controlled Aggression (100% to 60% HP)
During the initial phase, the Two-Headed Orc attacks with slow, single-swing animations.
- Establish the Rhythm: Wait for the boss to finish a strike, move in for two light attacks or one heavy card cast, then step out of range.
- Conserve Resources: Do not burn all your movement cards or energy consumables early. Rely on basic walking vector angles to dodge the horizontal sweeps.
- Build Combo Indicators: If your character archetype relies on building status stacks (e.g., Bleed, Burn, or Combo Points), apply them gradually during Phase 1 to trigger large damage payouts right as Phase 2 begins.
Phase 2: The Enraged Frenzy (60% to 0% HP)
At 60% health, the Two-Headed Orc roars, gaining a permanent 20% movement speed increase and adding follow-up swings to its basic attacks.
- Watch for Double Cleaves: The single horizontal sweep becomes a two-hit combo. Never jump back into melee range after the first swing; wait for the second back-handed sweep to resolve fully.
- Faster Wind-Ups: Recovery frames are shortened by roughly 30%. Limit your counter-attack to a single high-impact skill per rotation.
- Manage Arena Hazards: Ground fissures left behind by the Enraged Overhead Slam remain active for several seconds. Avoid pathing through glowing red ground cracks, as they inflict slow effects that make dodging the next swing impossible.
---
Class and Archetype Strategies in Rogue Legend
Different character builds in Rogue Legend require specific tactical adjustments during this boss fight.
Ranged / Caster Archetypes
- Strategy: Maintain maximum casting distance while utilizing spell cards with instant-cast parameters.
- Tactical Trap: Standing too far away can trigger the Orc’s leap or charge attack repeatedly. Stay at medium range—just far enough to clear the sweep, but close enough to easily step behind the boss during an overhead smash.
Melee / Bruiser Archetypes
- Strategy: Stick to the boss’s rear left hip. This positional dead-zone forces the boss to rotate slowly before executing an attack, giving you extra reaction time.
- Tactical Trap: Over-committing to full melee combos. Cut your attack rotations short to preserve stamina for defensive sidesteps.
Dodge / Mobility Archetypes
- Strategy: Utilize invulnerability frames (i-frames) on your dodge cards to pass through horizontal cleaves directly into the boss’s back.
- Tactical Trap: Spamming dodges early in the fight, which leaves you without stamina or action points when the Orc initiates its tracking charges in Phase 2.
---
Common Player Mistakes and How to Avoid Them
- Greedy Punishes: Attempting to cast heavy three-energy spells during minor recovery windows. Correction: Only use long-cast cards after forcing the boss into a wall-stun charge or during the long recovery of an Overhead Slam.
- Dodging Straight Backward: Trying to escape horizontal cleaves by moving directly away from the boss. Correction: Dodge diagonally forward and past the boss's arm to break its tracking trajectory.
- Ignoring Energy Management: Expending all energy points on attack cards and leaving none for defensive maneuvers. Correction: Always end your attack turn with at least one energy point or defense card reserved.
- Getting Cornered: Allowing the boss to back you into the edge of the board tile. Correction: Use your mobility cards preemptively to reset the fight back to the arena center before your space shrinks.
---
Execution Checklist
To defeat the Two-Headed Orc in Rogue Legend Chapter 2, execute this core strategy:
- Trim your deck of slow, expensive cards before entering the boss node.
- Circle-kite counter-clockwise to exploit the slower rotation speed of the boss's off-hand head.
- Dodge perpendicular to charges, ideally guiding the boss into arena pillars for free stuns.
- Double-check for follow-up swings once the boss enters Phase 2 at 60% HP.
- Limit your counter-attacks to short burst windows after heavy slams to keep your run alive.
Free Rogue Legend Codes
Current active codes and how to redeem them.

James Brown
James focuses on Android gaming on PC, emulator setup, controls, performance tuning, and practical troubleshooting for longer play sessions.
COMMUNITY
Player Comments
123 players commented on this guide.
I wish I had read this before upgrading the wrong thing.
Good guide for Rogue Legend players. The strategy part was useful.
I tried this today and it worked better than my old setup.
This guide answered the exact question I had.