
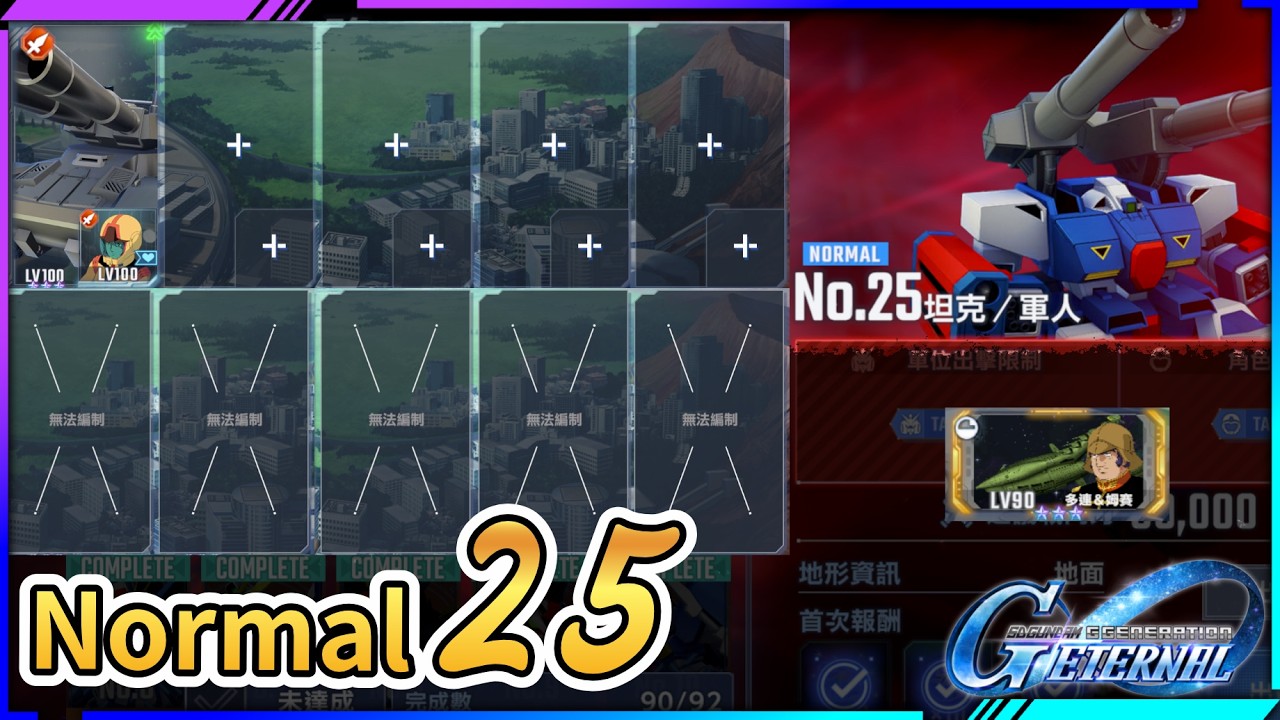
You can clear Eternal Road Normal 25 in SD Gundam G Generation ETERNAL without deploying an expensive full squad by fielding a single developed Guntank paired with a generic Earth Federation Soldier pilot. This minimalist deployment forces hostile AI into a predictable single-file approach corridor, allowing you to pick off opposing units from three to four tiles away while staying outside their retaliatory range.
Why the Solo Guntank Strategy Works
Standard deployments often split enemy attention across multiple allied units, which can lead to chaotic flanking maneuvers and draw fragile support units into direct combat. Deploying only one unit ensures every enemy on the map advances along the same path toward a single target.
The Guntank's primary advantage is its three-to-four tile artillery attack range. Most hostile units on Normal 25 rely on short-range beam sabers, machine guns, or mid-range rifles operating within one to two tiles. When attacked from maximum artillery range, these enemies cannot trigger counterattacks during your turn.
Additionally, this strategy keeps pilot investment low:
- No premium rarity needed: High-tier Ultra Rare (UR) or Super Special Rare (SSR) pilots with premium abilities are not required.
- Accessible stats: A basic, farmable Earth Federation Soldier provides sufficient base stats to clear the encounter when paired with proper range management.
| Tactical Factor | Solo Guntank Deployment | Full Standard Squad Deployment |
|---|---|---|
| Pilot Requirement | Generic Earth Federation Soldier (budget) | Multiple named SSR or UR pilots |
| Enemy AI Pathing | Single predictable corridor | Dispersed, multi-directional aggro |
| Engagement Range | 3–4 tiles (artillery distance) | 1–2 tiles (melee and mid-range clashes) |
| Player-Phase Exposure | Zero counterattack risk from out-ranged targets | Variable exposure across secondary units |
| Execution Margin | Requires exact spacing and hit reliability | Forgiving due to squad redundancy |
Build and Upgrade Priorities
Because a generic pilot lacks specialized evasion buffs or active commander skills, the Guntank's offensive stats must carry the encounter.
- Upgrade artillery attack power: Invest development resources into the Guntank's main physical artillery cannon. The weapon must deal enough damage to defeat or cripple advancing targets in one to two volleys so fast skirmishers cannot close the distance.
- Prioritize hit accuracy: Ensure the Guntank's accuracy stat is high enough to prevent costly misses, which can instantly compromise your spacing advantage.
- De-prioritize defense stats: Heavy investment in defensive survivability is unnecessary if spacing is maintained, as the goal is to eliminate targets before they can attack.
Step-by-Step Kiting and Positioning Sequence
Maintaining a strict three-to-four tile buffer zone between the Guntank and enemy units is essential for survival.
- Hold back on Turn 1: Do not advance toward the center of the map on the opening turn. Take a defensive stance or shift laterally within your deployment area to force the enemy vanguard to burn movement crossing empty ground.
- Target high-mobility skirmishers first: Inspect enemy movement ranges before confirming each attack. Prioritize the fastest units, as their extended range poses the greatest threat of closing into melee distance.
- Maintain the spacing buffer: Position the Guntank so it sits exactly one tile outside the maximum movement-plus-attack reach of the nearest hostile unit while keeping that target within your artillery range.
- Funnel enemies through terrain choke points: Back away toward natural map obstacles and narrow choke points. Bottlenecked enemies will block the units behind them, preventing them from advancing or attacking while you destroy the front-runner.
Energy Management and Enemy Phase Decisions
Heavy artillery attacks consume substantial Energy (EN). Attacking indiscriminately or making low-percentage counterattacks will deplete your EN pool before the stage ends. Manage enemy phases using these rules:
- Choose Defend: Use this option when an enemy attacks from extreme range with low base damage. This conserves EN while minimizing chip damage.
- Choose Evade: Select this when targeted by armor-piercing or heavy-hitting attacks to avoid taking critical hull damage.
- Counterattack conditionally: Only fire back on the enemy phase if the enemy's remaining health guarantees a kill and your hit probability is safely high.
Preserving the majority of your EN for the player phase ensures you eliminate threats cleanly without triggering retaliatory damage.
Limitations of the Solo Clear
While this strategy is an efficient way to secure first-clear milestone rewards on Normal difficulty, it carries specific risks:
- Zero recovery margin: A single missed shot or spacing miscalculation can allow a melee unit to close in, with no squad mates available to peel or heal.
- Difficulty ceiling: This strategy relies on the modest enemy health pools and mobility found on Normal 25. It becomes significantly less viable in Hard and Expert difficulties, where enemies feature higher movement, inflated HP, and anti-artillery defenses.
Once you collect the first-clear materials from Eternal Road Normal 25, reinvest those resources into developing a balanced, multi-role roster for higher difficulty tiers.

Free SD Gundam G Generation ETERNAL Codes
Current active codes and how to redeem them.

Sarah Williams
Sarah specializes in RPG and collection games, explaining team building, character growth, and beginner-friendly ways to avoid expensive early mistakes.
COMMUNITY
Player Comments
32 players commented on this guide.
This guide answered the exact question I had.
This helped me understand strategy much better.
Good guide for SD Gundam G Generation ETERNAL players. The strategy part was useful.
The tips are practical and easy to follow.