
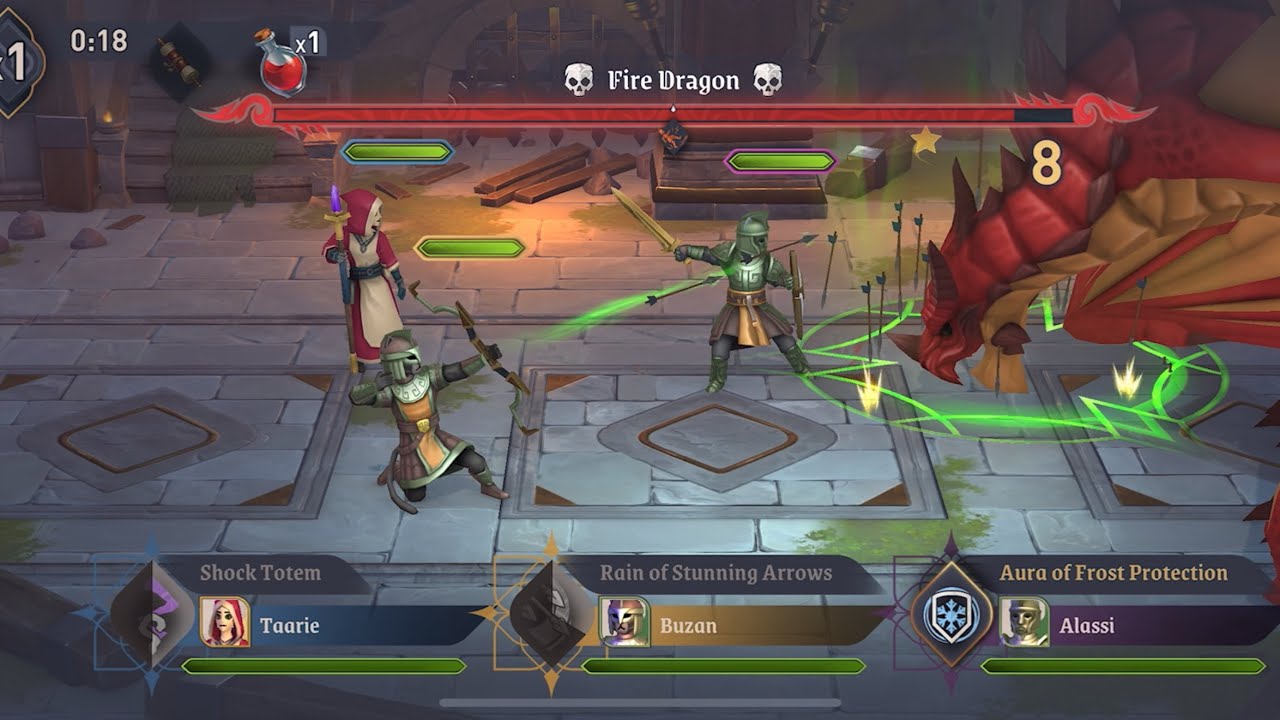
To defeat the Final Dragon in The Elder Scrolls: Castles, bring a balanced three-hero team consisting of a sword-and-shield tank, a restoration staff healer, and a high-DPS striker. Victory requires manually steering your frontline defender to turn the dragon away from the squad, stepping perpendicular to dodge channelled breath cones, and timing shield blocks to absorb overhead ground slams.
Recommended Team Setup and Gear
Unbalanced squads, such as all-damage lineups or fragile mage teams, quickly wipe to unavoidable cleave damage. Upgrade your smithy and sewing table before attempting this encounter to equip the necessary gear tiers.
| Role | Weapon Type | Armor Type | Primary Combat Function |
|---|---|---|---|
| Tank | Sword & Shield | Heavy Plate (Orcish or better) | Turn boss head, absorb slams, maintain threat |
| Striker | Dual Daggers or Bow | Light or Medium Armor | Exploit recovery windows from flanks or range |
| Healer | Restoration Staff | Mage Robes | Sustain frontline, counteract collateral area damage |
Select subjects with defensive traits such as Enduring or Mighty for your frontline defender to maximize damage mitigation against claw sweeps and bites. For your healer and ranged damage dealer, equip armor enchanted with elemental resistances (specifically fire or frost) to survive stray breath ticks.
Boss Positioning and Attack Evasion
Auto-combat pathing routes all three units into the dragon's frontal arc, grouping them into lethal cleave attacks. You must control your units manually from the start of the fight.
- Turn the dragon away immediately: Drag your sword-and-shield fighter past the dragon at the opening bell. Anchor the tank on the far side of the arena so the boss faces directly away from your ranged units.
- Re-anchor if the boss turns: If the dragon pivots toward your backline, tap your tank to re-engage and rotate the beast back into position.
- Dodge channelled breath cones: When the dragon raises its head and a ground telegraph illuminates, drag all caught characters sideways out of the cone. Running straight back keeps heroes in the damage path, whereas moving perpendicular clears the hazard quickly.
- Offset your support spacing: Keep your healer positioned diagonally relative to the dragon and tank rather than directly behind the frontline, as shockwaves can travel straight backward from impact zones.
Ability Timing and Sustain
Managing ability cooldowns is more effective than spamming skills as soon as they become available.
- Save shield blocks for overhead slams: Do not waste active shield abilities on basic bite attacks. Watch for the dragon's telegraphed overhead wind-up and activate the block to negate the heavy damage and stagger.
- Stagger healing casts: Avoid triggering restoration abilities for minor chip damage. Hold heals until your tank drops below half health or until immediately after a major attack resolves, preventing cooldown gaps when burst damage hits.
- Attack during recovery frames: The dragon pauses momentarily after completing major sequences. Trigger high-damage offensive skills, such as dual-dagger flurries, during these recovery frames while fighters are safe from retaliation.
- Do not rely on revive potions: Revived subjects spawn with low health and no defensive buffs. If a character falls, prioritize manual evasion and mitigation with your remaining survivors rather than trading repeated revives into active boss cleaves.

Free The Elder Scrolls: Castles Codes
Current active codes and how to redeem them.

James Brown
James focuses on Android gaming on PC, emulator setup, controls, performance tuning, and practical troubleshooting for longer play sessions.
COMMUNITY
Player Comments
34 players commented on this guide.
This helped me understand strategy much better.
This guide answered the exact question I had.
I wish I had read this before upgrading the wrong thing.
The tips are practical and easy to follow.