
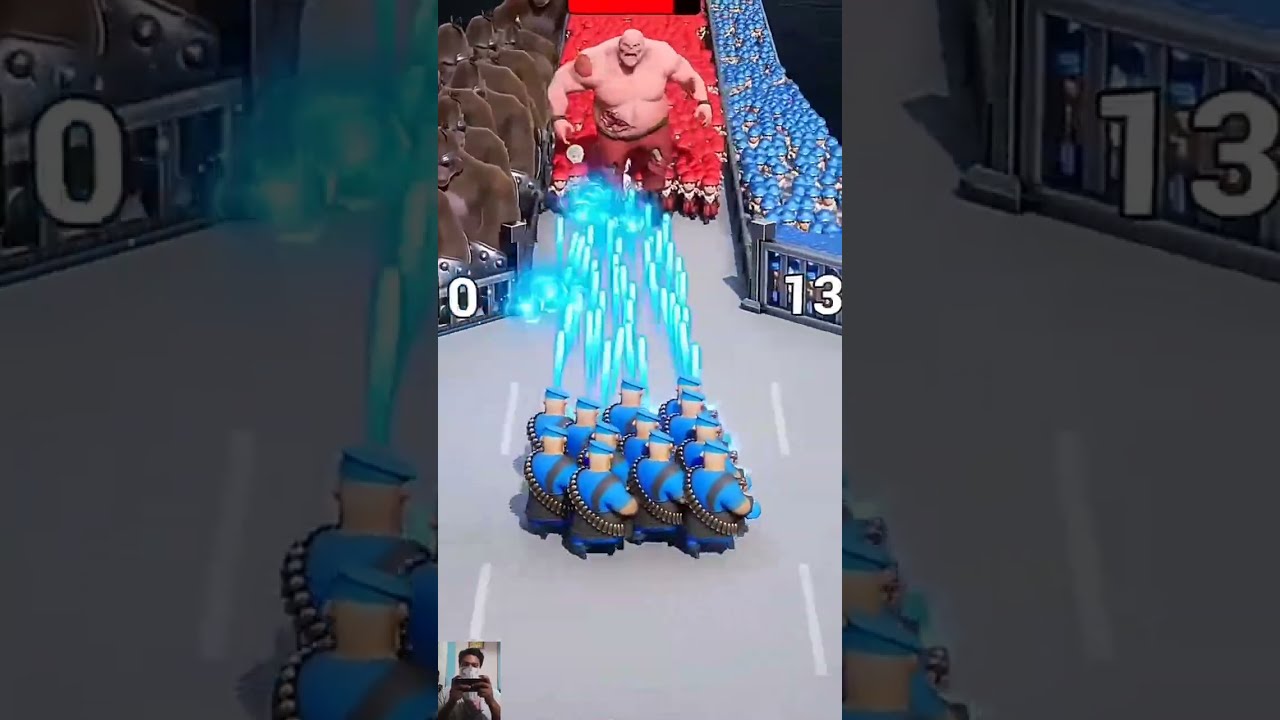
To clear Guard the Bridge stages in Top War: Battle Game, lock your squad's gunfire onto a single blue gate to pump up its numerical value before crossing it. Early in a run, choose flat addition gates (+5) while your army is small, then switch to multiplier gates (x2 or higher) once you have four or more soldiers. Building a massive unit count creates an exponential damage loop that lets you melt barricades and defeat the final boss wave at the bridge checkpoint.
Guard the Bridge Mechanics
Guard the Bridge is a real-time minigame separate from island base merging and world-map battles. Your starting units automatically advance along a linear, multi-lane bridge while firing downfield.
Your run relies on three core mechanics:
- Dynamic Gate Values: Shooting blue arithmetic barriers increases their displayed addition or multiplication factors before your squad steps through them.
- Squad Duplication: When soldiers pass through a processed gate, your current squad size duplicates according to that gate's final value.
- Volume of Fire: Every additional soldier directly increases projectile output. Larger squads shred subsequent barriers and enemy waves in seconds.
When to Choose Multipliers Over Flat Additions
Selecting between flat additions and multipliers depends strictly on your current active squad count. Taking a flat addition early yields higher immediate growth, while multipliers provide exponential returns once you establish a baseline squad.
| Current Squad Size | Flat Gate (+5) Result | Multiplier Gate (x2) Result | Optimal Choice |
|---|---|---|---|
| 1 Soldier | 6 Soldiers | 2 Soldiers | Take Flat Addition (+5) |
| 2 Soldiers | 7 Soldiers | 4 Soldiers | Take Flat Addition (+5) |
| 5 Soldiers | 10 Soldiers | 10 Soldiers | Neutral (Take clearest path) |
| 10 Soldiers | 15 Soldiers | 20 Soldiers | Take Multiplier (x2) |
| 20 Soldiers | 25 Soldiers | 40 Soldiers | Heavily prioritize Multiplier (x2) |
Do not attempt to force a multiplier gate if your current squad lacks the firing power to crack its threshold before you reach it. Passing through an unprimed barrier yields only its baseline modifier.
How to Shoot Gates and Handle Hazards
Splitting your fire across multiple lanes weakens your overall scaling. Apply strict lane discipline to maximize your numbers:
- Focus One Gate at a Time: Lock your aim onto the highest-value blue gate the moment it appears. Pumping continuous bullets into one barrier raises its modifier to peak capacity.
- Shift Only at Caps: Do not switch targets until your chosen gate reaches its maximum value or an unavoidable hazard blocks your path.
- Neutralize Red Penalty Gates: Red gates subtract or divide your unit count. If bridge geometry prevents you from steering around a red gate, concentrate all gunfire into the barrier to lower its deduction or destroy it before impact.
Surviving the Checkpoint and Boss Wave
After clearing the bridge gauntlet, your surviving soldiers establish a defensive line at the far checkpoint. Enemy infantry, armored vehicles, and an elite boss will charge your position.
- Center Your Line: Position your squad in the middle lane of the bridge to provide the widest firing arc across all incoming approach routes.
- Focus Boss Targets: When the elite boss appears, direct your team's primary fire cone directly onto its center mass. Bosses possess deep health pools and deal lethal splash damage if they reach your barricade, making concentrated fire mandatory.
Common Mistakes That End Bridge Runs
Avoid these critical errors during a run:
- Tunnel-Visioning on Crates: Do not sacrifice lane alignment or gate upgrades to shoot side crates for minor coin drops. Raw troop count is the only factor that scales your survival at the checkpoint.
- Last-Second Lane Pivots: Swapping lanes immediately before a threshold often causes trailing soldiers to clip barriers or miss gates entirely, fracturing your squad.
- Ignoring Exit Sightlines: Red hazard gates frequently sit directly behind destructible walls or immediately after rewarding blue gates. Keep your eyes on the track ahead so you have time to shoot down the hazard or steer clear.
Free Top War: Battle Game Codes
Current active codes and how to redeem them.

Emily Johnson
Emily writes practical mobile strategy guides with a focus on resource planning, base progression, and the early decisions that shape a long-term account.
COMMUNITY
Player Comments
156 players commented on this guide.
This saved me time in the early game.
This guide answered the exact question I had.
Good guide for Top War: Battle Game players. The strategy part was useful.
I wish I had read this before upgrading the wrong thing.