
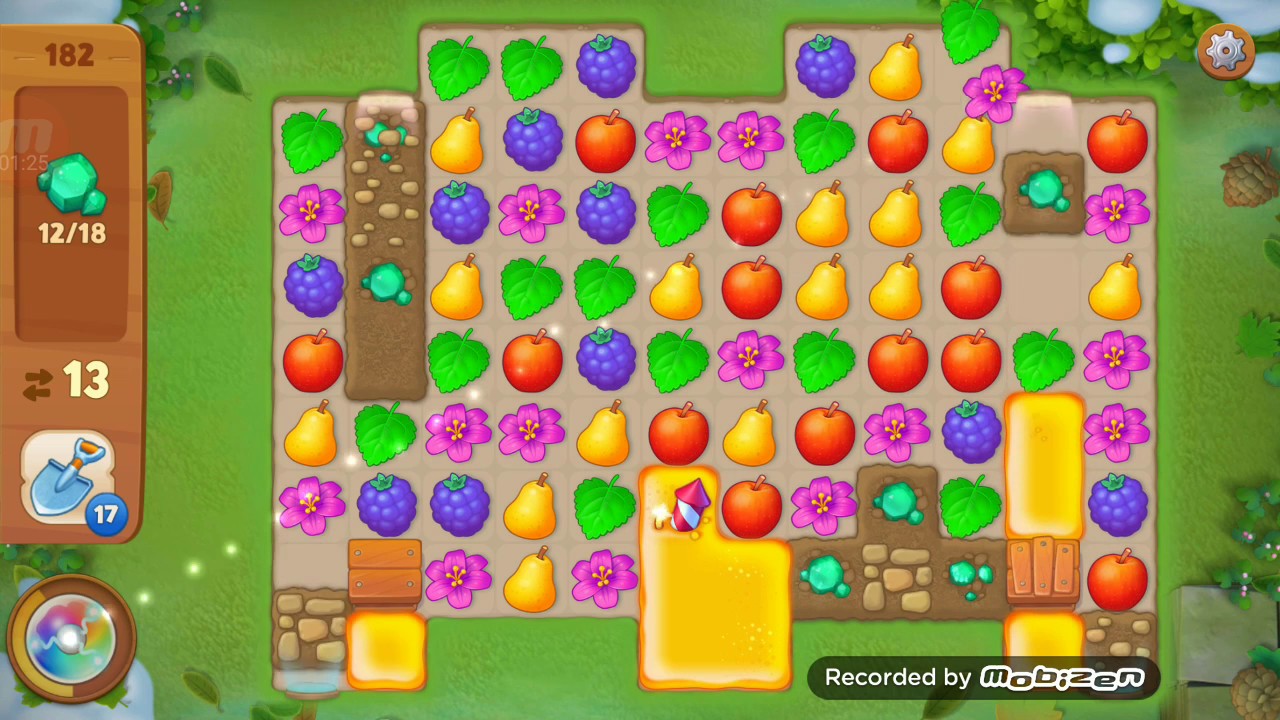
To beat Level 182 in Gardenscapes, immediately clear the wooden crates and multi-layered turf obstructing the upper columns to let puzzle pieces flow freely into the bottom of the board. Once the board opens, prioritize matches on the lowest available rows to trigger cascades and passively chip away at layered obstacles. Relying on basic three-tile matches will deplete your turn counter, so focus on crafting Bombs and Rainbow Blasts to clear tight corridors and hard-to-reach perimeter tiles.
Clear Upper Blockers to Restore Tile Flow
The primary failure point on Level 182 is restricted tile flow. Layered turf and wooden crates across the upper lanes prevent fresh pieces from dropping into the central and lower grid. Leaving these top obstacles intact restricts your options to weak three-piece matches in narrow corridors.
Begin the stage by targeting matches adjacent to the upper crates and turf patches. Opening these bottlenecks immediately allows gravity to refill the board from the top, expanding your available play space and providing the board area needed to create higher-tier explosives.
Use Low-Board Matches to Trigger Passive Cascades
Once pieces can fall through the grid, shift your focus to the bottom rows. Manipulating tiles near the base creates upward chain reactions that clear obstacles without using extra turns.
Prioritizing bottom-row matches provides three key advantages:
- Automatic Clearing: Falling pieces frequently land in three-in-a-row alignments next to layered grass, weakening them without direct turn investment.
- Passive Meter Charging: Unplanned cascade matches rapidly fill the Rainbow Blast gauge.
- Deadlock Prevention: Dropping columns reshuffle awkward tiles in narrow vertical alleys that cannot easily be matched manually.
Only break this rule if a match in the upper grid directly creates a Bomb or TNT barrel.
Craft and Combine Explosive Boosters
Standard three-tile matches are too slow to overcome the multi-layered obstacles within the move limit. Look for four-piece and intersecting five- or six-piece alignments to craft explosives that hit multiple blocked tiles simultaneously.
| Booster Type | Creation Requirement | Optimal Use on Level 182 |
|---|---|---|
| Firecracker | Match 4 tiles in a straight line | Clear single edge tiles or trigger adjacent explosives. |
| Bomb | Match 5 tiles in a T or L shape | Blast thick clusters of layered turf and open central corridors. |
| TNT | Match 6 tiles in an intersecting line | Clear large obstacle clusters and charge the Rainbow Blast gauge instantly. |
Whenever possible, avoid detonating isolated Firecrackers immediately. Drop them lower into the grid or position two explosives next to each other. Detonating paired explosives doubles their blast radius and significantly increases Rainbow Blast meter gain.
Maximize Rainbow Blast Combos and Manage the End Game
The Rainbow Blast is essential for clearing the outer borders of Level 182. Swapping a Rainbow Blast with an explosive like a Bomb or Firecracker scatters duplicate explosives across the entire grid, setting off a massive chain reaction that wipes out layered turf in hard-to-reach corners.
If you cannot maneuver an explosive next to a Rainbow Blast, swap it with the fruit color that appears most frequently next to your remaining obstacles. Removing all tiles of that color collapses the board, bringing fresh pieces into direct contact with target zones.
During the final turns:
- Avoid isolated corner chases: Do not waste three or four moves attempting manual matches against outer walls early in the run. Let collateral damage from central explosions weaken border tiles first.
- Shift to calculated moves: When your move counter reaches single digits, stop relying on speculative cascade matches and inspect remaining targets.
- Commit to one final explosive: If isolated targets remain on the edges, spend your final turns setting up a Bomb or Rainbow Blast rather than making piecemeal three-tile swaps.
Free Gardenscapes Codes
Current active codes and how to redeem them.

Michael Smith
Michael covers live-service games, events, reward systems, and efficient daily routines, turning frequent updates into clear actions for players.
COMMUNITY
Player Comments
102 players commented on this guide.
I wish I had read this before upgrading the wrong thing.
Can you add more details about strategy in a future update?
This helped me understand strategy much better.
I tried this today and it worked better than my old setup.