
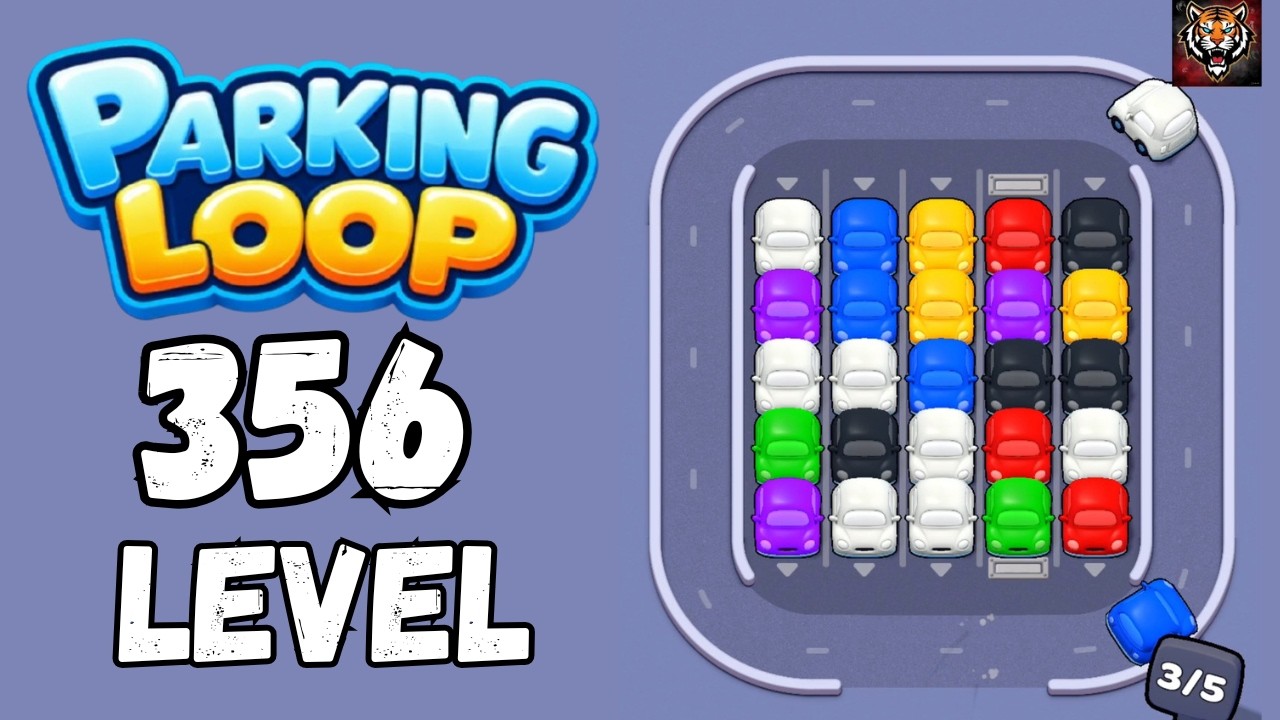
To beat Level 356 in Parking Loop, clear every unobstructed perimeter vehicle first before attempting to move blocked tandem cars. Releasing outer vehicles dismantles the gridlock, reveals inner rows, and establishes predictable intervals along the circulation route.
Tapping a car inside a blocked stall triggers a penalty buzz or causes an immediate crash into parked cars ahead. Follow a disciplined clearance sequence and use moving traffic visual cues to merge every vehicle safely.
Step 1: Empty Direct-Exit Perimeter Stalls
Begin by scanning the perimeter of the lot for vehicles that have an open, angled lane directly onto the loop track. These bays do not have barriers or neighboring bumpers blocking their paths.
- Locate an unobstructed compact car: Start with a vehicle parked along the outer edge where the entrance angle into the loop is widest.
- Observe upstream traffic: Vehicles on the loop travel at a consistent speed in a single rotational direction. Check oncoming traffic upstream before launching.
- Trigger the exit: Tap the car the instant an opening appears. Let it merge cleanly into the flow.
- Clear remaining outer bays: Repeat this process for all other front-line stalls that have direct access to the loop before interacting with any inner rows.
Step 2: Clear Tandem Bays in Two Distinct Phases
Level 356 features several stacked bays where rear vehicles sit directly behind front vehicles. Rear vehicles are locked until the car ahead fully leaves the stall.
Do not double-tap to release the rear vehicle immediately behind the front vehicle. A rapid follow-up tap usually causes the trailing car to collide with the lead car's rear bumper or merge directly into oncoming traffic. Once the lead vehicle merges, treat the newly unlocked rear car as a separate launch calculation. Let the rear car remain stationary until the next viable gap arrives.
Vehicle Clearance Differences
Different vehicle models require different spacing on the circuit:
| Vehicle Type | Clearance Speed | Required Merge Gap |
|---|---|---|
| Compact Car | Fast acceleration; clears stall quickly | Narrow window; fits into tighter gaps |
| Mid-Sized Sedan | Standard acceleration; takes roughly 0.5 seconds longer to clear stall | Moderate window; requires standard loop spacing |
| Extended Van | Slower acceleration; elongated body swings wide on turns | Wide window; requires a gap at least twice its body length |
Step 3: Time Merges Using the Rear-Bumper Trigger
Transit from a parking stall to the active loop lane takes roughly 0.4 to 0.7 seconds. If you wait until an empty gap is centered directly in front of your stall, the opening will close before your car arrives.
Use the circulating traffic ahead of the gap as your visual launch mark:
- Focus on the moving vehicle currently passing your stall's exit path.
- Watch its rear bumper cross the outer boundary line of your merge junction.
- Tap your parked vehicle the moment that bumper clears the junction threshold.
- Your car will accelerate across the stall line and slot directly behind the passing vehicle, leaving enough buffer space for oncoming traffic behind you.
Mistakes That Cause Level 356 Collisions
Avoid these common failure points during your run:
- Rapid-fire tapping: Clearing two cars successfully often tempts players to rush. The loop compresses as more vehicles enter the lane, meaning late-stage gaps are smaller and require stricter patience.
- Corner stall miscalculations: Stalls positioned along tight curves require vehicles to turn wider, slowing their entry. Give corner vehicles slightly larger lead times.
- Panic tapping: If a merge cuts close, do not tap an adjacent car in haste. Wait out the traffic cycle to regain your rhythm.
Free Parking Loop Codes
Current active codes and how to redeem them.

Emily Johnson
Emily writes practical mobile strategy guides with a focus on resource planning, base progression, and the early decisions that shape a long-term account.
COMMUNITY
Player Comments
86 players commented on this guide.
This helped me understand strategy much better.
The explanation is clear, especially for beginners.
This saved me time in the early game.
Good guide for Parking Loop players. The strategy part was useful.