
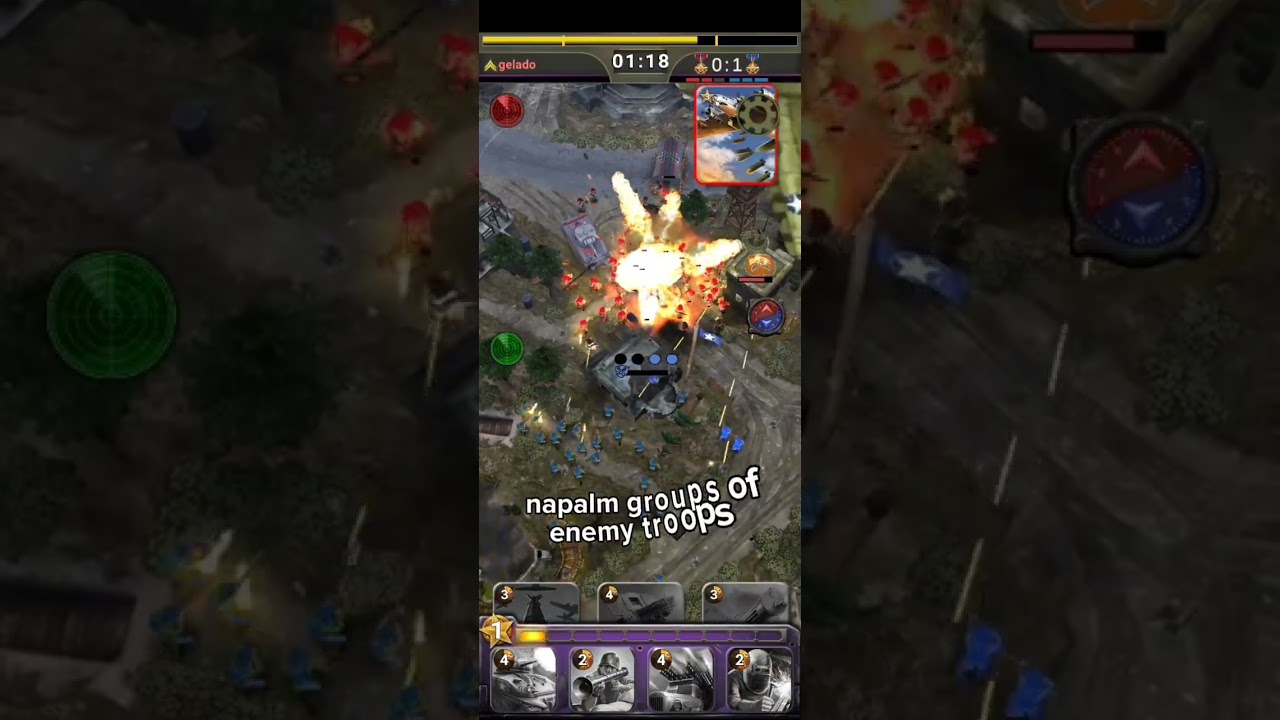
To get the most value from tactical orders in SIEGE: World War II, reserve expensive air strikes and artillery barrages for clustered enemy pushes rather than isolated infantry. Firing tactical cards must generate positive supply trades or clear the path for an active ground advance. Expending heavy orders on low-cost single targets drains your supply meter and leaves your defensive line vulnerable to counter-attacks.
Matching Tactical Orders to Battlefield Targets
Every combat order serves a specific combat role based on target armor, radius, and supply cost. Precision runs clear low-health infantry groups, while heavy barrages and surgical strikes neutralize fortified structures and heavily armored vehicles such as the Sherman or Tiger tank.
| Tactical Order Type | Ideal Battlefield Target | Primary Trade-Off |
|---|---|---|
| Light Strafe / Precision Run | Clustered Riflemen, Snipers, Bazooka crews | Low building damage; ineffective against heavy armor |
| Heavy Artillery Barrage | Clustered armor columns, entrenched bunkers | Higher supply cost; slight delay before impact |
| Defensive Smoke / Disruption | High-damage vehicle lines, heavy gun turrets | Deals zero hull damage; requires troop follow-up |
| Surgical Air Strike | Stationary fortified emplacements, heavy tanks | High supply cost; leaves the lane open if mistimed |
Use light strafes against vulnerable backline support units, such as Mortar Crews, Snipers, and Bazooka squads, when they cluster behind advancing armor. Reserve heavy artillery and air strikes for situations where you can eliminate an expensive frontline vehicle alongside its infantry escort in a single blast.
Timing Defensive Strikes Against Push Waves
When defending against a coordinated assault, hold your tactical cards until the enemy formation crosses the battlefield midline. Dropping an artillery barrage too early allows advancing units to stop outside the blast radius, while deploying it too late allows armored vehicles to begin damaging your forward bunkers.
- Maintain a supply reserve: Avoid spending all available supply on ground units as soon as the bar fills. Keep a floating supply buffer so you can react immediately to sudden pushes.
- Track unit grouping: Wait for trailing infantry escorts to catch up to the lead tank before setting your targeting reticle.
- Lead the target area: Account for the brief deployment delay on heavy artillery by placing the center of the reticle slightly ahead of the advancing column.
- Clean up isolated armor: Once the strike wipes the escorting anti-infantry and bazooka units, let your command post turrets and cheap defensive units dispatch the remaining tank.
Targeting Bunkers and Defensive Reinforcements
Directly shelling an enemy bunker from full health is inefficient and allows your opponent to build a decisive unit advantage in the open lanes. Tactical damage against structures should primarily support ground troops that have already pushed past the midfield.
Maximize bunker damage by aiming area-of-effect strikes at the seam between the enemy bunker and the deployment zone in front of it. When defending players drop reinforcement squads to block your advancing troops, an overlapping strike damages the fortification while instantly eliminating the newly spawned defenders. This removes the defense, prevents the opponent from establishing a trench line, and lets your surviving tanks and infantry finish the structure.
Upgrading Tactical Cards for One-Shot Thresholds
Prioritize spending gold and reward crates on core offensive orders to ensure they reach reliable one-shot elimination thresholds. A damage-dealing tactical strike that leaves standard Riflemen or support squads with a sliver of health forces your turrets to waste time acquiring targets, negating your supply advantage.
Focus early card upgrades on your primary artillery barrage or direct air strike before leveling experimental or situational cards. Keeping your combat orders leveled alongside your frontline tanks ensures that your support fire remains potent against upgraded defensive health pools as you climb battle tiers.
Free SIEGE: World War II Codes
Current active codes and how to redeem them.

Michael Smith
Michael covers live-service games, events, reward systems, and efficient daily routines, turning frequent updates into clear actions for players.
COMMUNITY
Player Comments
134 players commented on this guide.
Can you add more details about strategy in a future update?
I tried this today and it worked better than my old setup.
Nice guide. I am checking the other SIEGE: World War II articles next.
Good guide for SIEGE: World War II players. The strategy part was useful.