
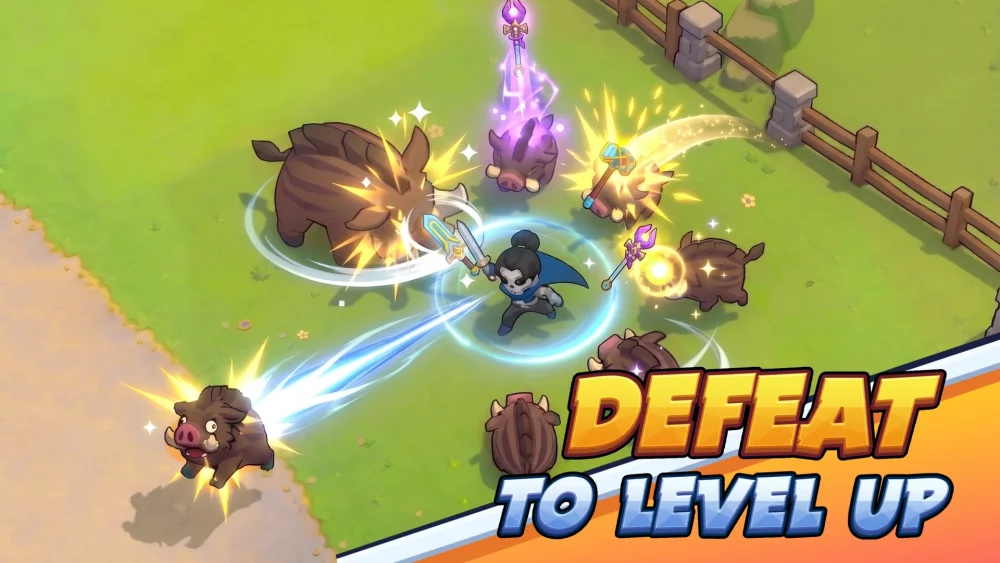
Clearing Dark Mirror Level 10 in Skull Hero is the ultimate test of your mechanical skill, itemization, and tactical discipline. At this difficulty tier, enemies are relentless, and the First Hero stands as a gatekeeper that demands perfection. The most consistent and effective strategy to conquer these late-game stages involves a synergistic pairing of the Aqua Skull and the Archmage. By alternating between the Aqua Skull’s fluid, displacement-focused kit and the Archmage’s screen-clearing magical burst, you create a "hit-and-run" rhythm that minimizes your time in danger while maximizing your damage-per-second (DPS).
The Core Mechanic: Why Aqua and Archmage Work
To succeed in Skull Hero at the highest level, you must understand the difference between "active" and "passive" windows. The Aqua Skull provides exceptional active mobility. Its ability to create water pools and utilize "inundation" mechanics allows you to reposition instantly, dodging telegraphed boss attacks while simultaneously staggering smaller, encroaching enemies.
The Archmage, conversely, is your primary damage engine. It is a "glass cannon" in the truest sense; it possesses low defensive utility but unrivaled magical scaling. The logic behind this duo is simple: the Aqua Skull creates the safety and the "openings," while the Archmage delivers the payload. If you try to play the Archmage solo, you will eventually be overwhelmed by the sheer density of attacks in Dark Mirror Level 10. If you play the Aqua Skull solo, your damage output will likely fall behind the boss's health regeneration or enrage timers.
Mastering the Aqua Skull’s Tactical Utility
Do not underestimate the Aqua Skull. In the hands of a novice, it is merely a movement tool; in the hands of an expert, it is a battlefield controller.
- Inundation Control: Use your water splash effects to push back waves of enemies. In Dark Mirror 10, crowd density is high. By keeping enemies at bay with water zones, you prevent them from surrounding you.
- The "Safety Net" Swap: Always keep the Aqua Skull as your "escape" option. If you are mid-animation with the Archmage and notice a boss wind-up, swap immediately to the Aqua Skull to utilize its superior dash and invulnerability frames.
- Cooldown Management: Ensure your Aqua Skull abilities are leveled up to maximize the duration of your water pools. These pools serve as a passive deterrent that gives you breathing room to cast Archmage spells.
Maximizing Archmage DPS for Boss Encounters
The Archmage is your heavy hitter, but it is vulnerable during spell casting. To optimize your performance against the First Hero, you must treat your spells as "burst rotations" rather than sustained attacks.
- Wait for the Stagger: Only initiate your major Archmage spells after the Aqua Skull has successfully triggered a crowd-control effect or after the boss has just finished a lengthy attack animation.
- Itemization Synergy: Focus exclusively on Magic Attack and Skill Cooldown Reduction. Items like the "Mana Bone" or "Magic Potion" variants are essential. If your cooldowns are too long, you lose your ability to burst, which forces you to linger in the Archmage form—this is when most players take unnecessary damage.
- Positioning: Because the Archmage’s spells often cover large areas, you do not need to be point-blank. Maintain a medium-range distance where you can see the boss’s telegraphs clearly.
The Optimal Rotation: Swapping Strategy
The "Swap" mechanic in Skull Hero provides a temporary benefit or attack. For this build, timing the swap is the difference between life and death.
- Engagement Phase: Start with the Aqua Skull. Bait the boss into attacking, dodge using your movement ability, and leave a water pool behind.
- Burst Phase: Swap to the Archmage the moment the boss starts their recovery animation. Unload your highest-damage spells immediately.
- Disengagement Phase: As soon as your main burst spells are on cooldown, swap back to the Aqua Skull. Use the swap animation to reposition to a corner of the screen, away from the boss’s reach.
Avoiding Common Pitfalls in Dark Mirror 10
Even with the best skulls, Dark Mirror 10 is punishing. Avoid these common mistakes:
- Greeding for Damage: The most common way players die is by trying to squeeze in one extra Archmage spell when the boss is clearly signaling an attack. If the boss moves, stop casting and move. You have more chances to hit them; you only have one chance to survive.
- Ignoring Defensive Itemization: While you need Magic Attack, do not neglect defensive items that provide "Cooldown Recovery" or "Damage Reduction." A dead Archmage does zero DPS.
- Failing to Scale: By the time you reach the First Hero, your items should be fully evolved. If you are entering the final fight with low-tier items, you will struggle to overcome the boss's massive health pool, regardless of your skill.
Practical Tips for the First Hero Fight
The First Hero fight consists of multiple phases. Each phase requires a slightly different approach:
- Phase 1 (The Duel): Use the Aqua Skull to bait his sword swings and the Archmage to poke him from distance. Keep your distance; do not get greedy with melee range.
- Phase 2 (The Chaos): When he starts calling down massive attacks, your Aqua Skull’s movement is your best friend. Use your dash to weave through the patterns, only swapping to the Archmage for quick, singular shots when you are 100% safe.
- Phase 3 (The Final Stand): This is a DPS check. If you have been consistent with your itemization, your Archmage burst should be able to melt his health. If you are struggling, check your Magic Attack modifiers and ensure your "Magic Damage" percentage is as high as possible.
By mastering the rhythm of swapping between the nimble Aqua Skull and the devastatingly powerful Archmage, you turn the frantic chaos of Dark Mirror Level 10 into a controlled, tactical execution. Remember: in Skull Hero, patience is a resource just as vital as your health bar. Stay mobile, stay focused, and prioritize your survival above all else.

Free Skull Hero Codes
Current active codes and how to redeem them.

Emily Johnson
Emily writes practical mobile strategy guides with a focus on resource planning, base progression, and the early decisions that shape a long-term account.
COMMUNITY
Player Comments
99 players commented on this guide.
The explanation is clear, especially for beginners.
Nice guide. I am checking the other Skull Hero articles next.
This guide answered the exact question I had.
Good guide for Skull Hero players. The heroes part was useful.